Minds On
Let’s get started!
How did they make it?
Explore the following examples of artwork.
- How do you think the artists created their work?
- What kind of materials did they use?
- What kind of shapes do you notice in the artwork?
Record your ideas on paper, digitally or as an audio recording.
Share your thoughts with a partner, if possible.
Example 1

Prints by Barbara Hengstenberg
These pieces are stencil creations. There are 8 pieces in the frame and each one is different, some are only using green, one is using blue, grey, and another is using yellow and red in the same piece.
Example 2
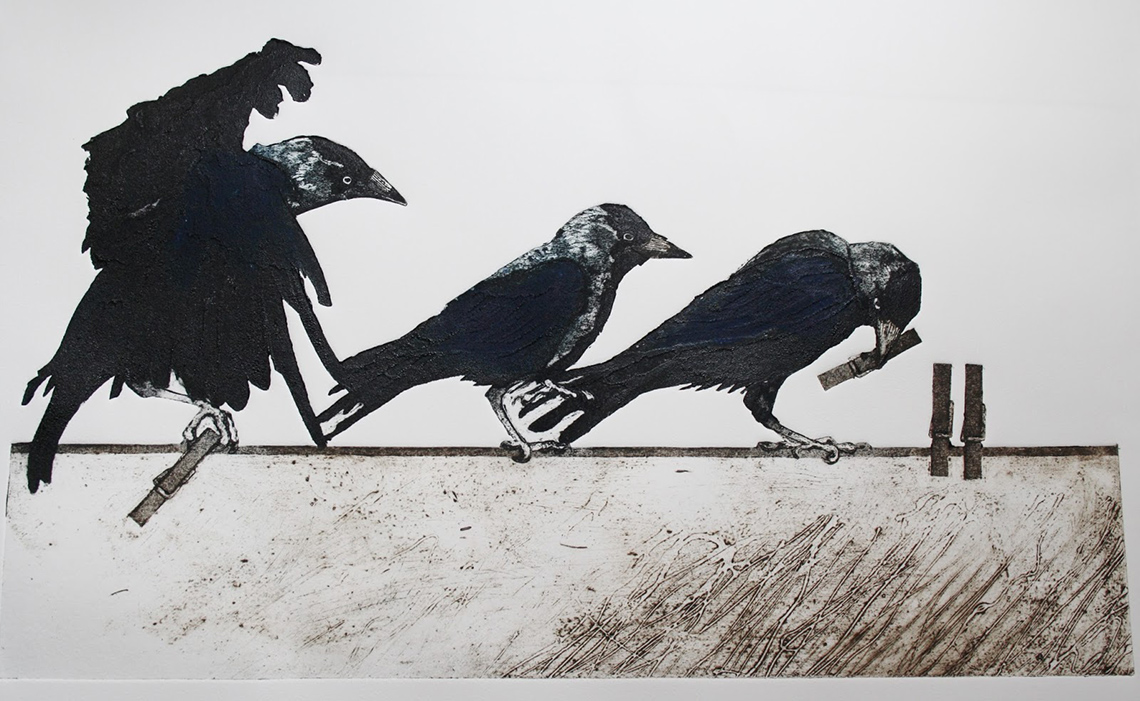
Print by Sue Brown
This piece includes three birds on a wire. Each bird is angled differently. The one on the right is holding something in its mouth. The bird in the centre has its head facing straight ahead. The bird on the left has one wing in the air curving above its head and is facing the other two birds. This piece is all black, white and includes some brown under the wire.
Example 3

Waiting for the Spring 27/30 by Akiko Taniguchi, 1998
This piece is a light background with a large green circular section in the middle. There is a large black section at the bottom with a series of thin sticks extending vertically from the black section. At the top of each thin stick is a circle, also coloured black.
Action
Get ready, get set…
Creating prints
In the Minds On, you explored prints. Printmaking involves attaching materials to a board called a printing block to create a design.
The surface of the printing block is covered in ink or paint and pressed onto paper.
A printing block can be used multiple times.
There are examples of printing blocks that use natural materials.
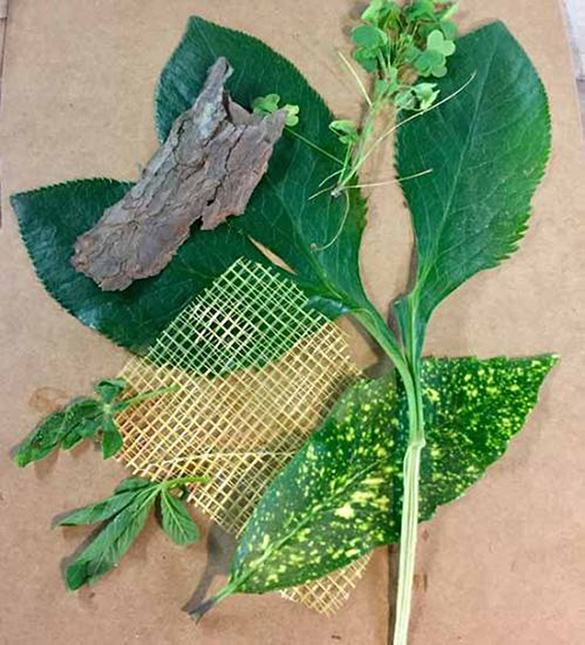
Block by Barbara Hengstenberg
A collection of different materials from nature that vary in texture, size, shape, and pattern. There are four large leaves and a piece of tree bark laying on top. There are also three other different smaller leaves and a small piece of plastic net.
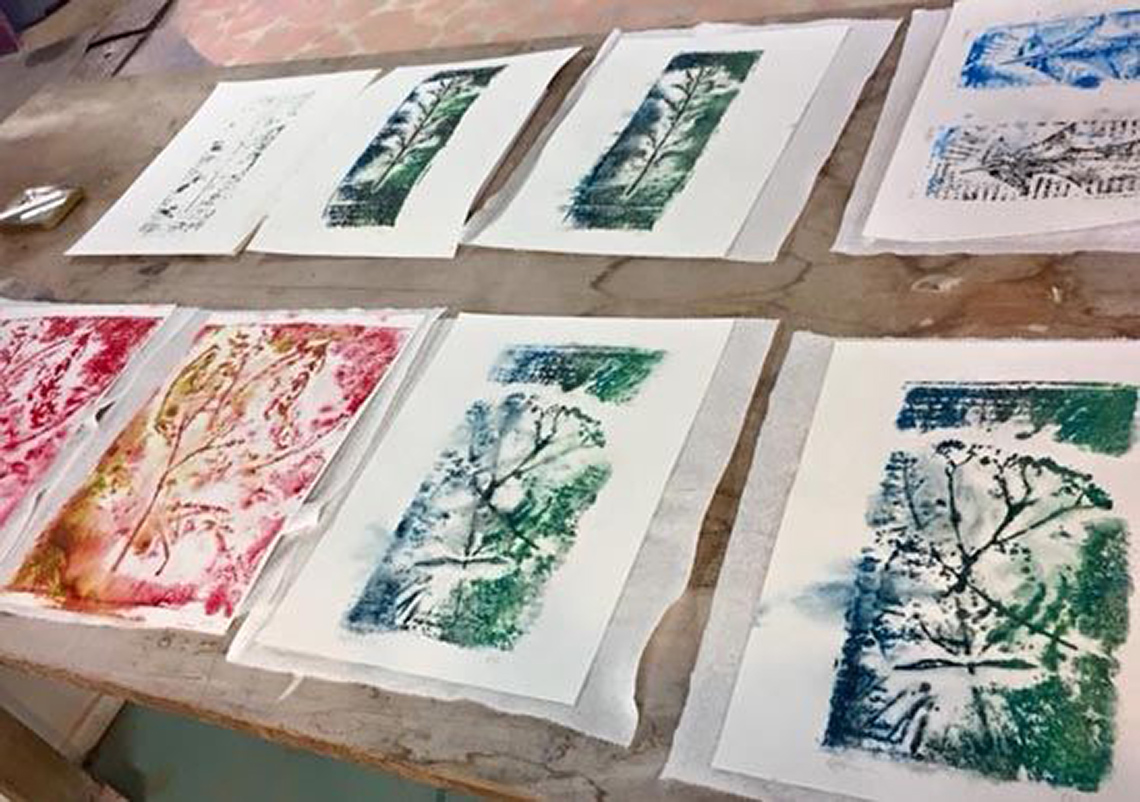
Prints by Barbara Hengstenberg
These pieces are stencil creations. There are 8 pieces in the frame and each one is different, some are only using green, one is using blue, grey, and another is using yellow and red in the same piece.
What do you notice about Barbara Hengstenberg’s prints?
Press ‘Let’s Check’ to reveal a possible answer.
Materials can be also be sculpted to form the block which prints are created from. Sue Brown created a block sculpted from different kinds of paper.
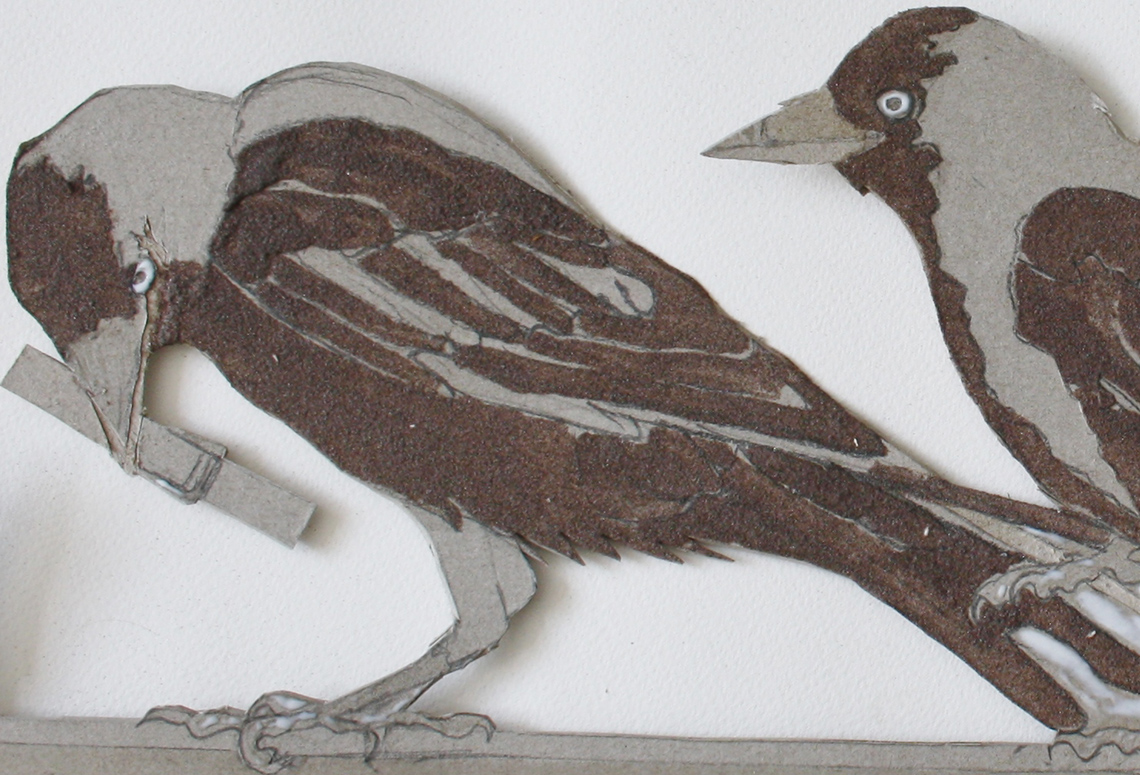
Block by Sue Brown, 2015
This piece includes two birds. The bird on the left is holding a clothes pin and is facing down. The bird on its right is facing the first bird. These birds are created with brown and white detailing, creating the appearance of feathers.
Once printed, it creates the following effect:

Print by Sue Brown
This piece includes three birds on a wire. Each bird is angled differently. The one on the right is holding something in its mouth. The bird in the centre has its head facing straight ahead. The bird on the left has one wing in the air curving above its head and is facing the other two birds. This piece is all black, white and includes some brown under the wire.
What do notice in the Sue Brown’s print? What might be the story of this piece?
Press ‘Let’s Check’ to reveal a possible answer.
Akiko Taniguchi is a Japanese artist who lives in Edmonton Alberta. They use natural materials to create their printing block. After creating a print, they add more details using a process called etching.
What is etching?
A printmaking process. A design is scratched or carved into a material. Ink is wiped on the material. When the ink is wiped off, the carved lines keep some ink. When paper is pressed against the material, the ink is stamped on to the paper.
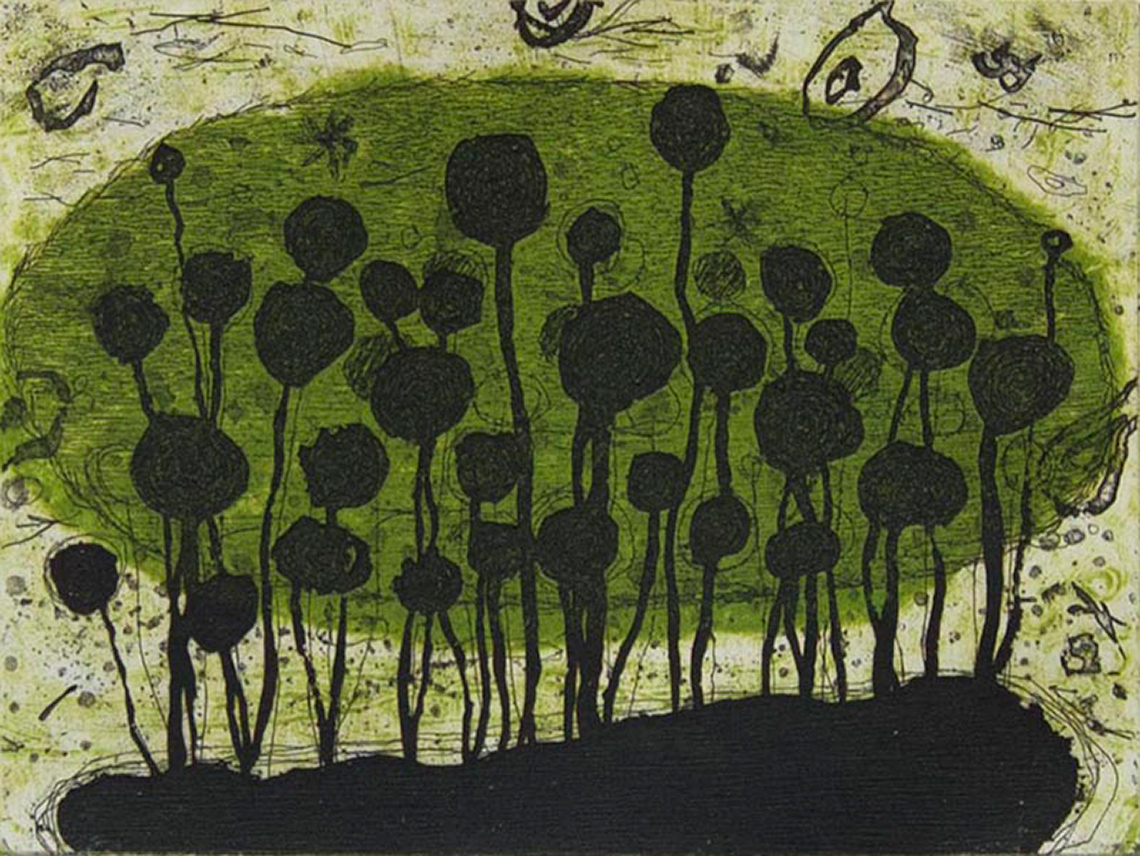
Waiting for the Spring 27/30 by Akiko Taniguchi, 1998
This piece is a light background with a large green circular section in the middle. There is a large black section at the bottom with a series of thin sticks extending vertically from the black section. At the top of each thin stick is a circle, also coloured black.
The name of the print is called “Waiting for the Spring”. How has Akiko shown this idea in the artwork?
Press ‘Let’s Check’ to reveal a possible answer.
Using shapes in prints
Artists might use geometric and/or organic shapes in their monoprints. These shapes might be asymmetrical or symmetrical.
What is asymmetrical?
Shapes or forms with two halves that are not exactly the same.
What is symmetrical?
Shapes or forms with two halves that are the exact same.
If a shape is symmetrical, we can run a line of symmetry through the center of the shape, and it would be equal on both sides.

If a shape is asymmetrical, when we create a line of symmetry through the center of the shape, it is not equal on both sides.

Learning check!
Nature is filled with symmetry and asymmetry. Can you identify which objects from nature are symmetrical and which are asymmetrical?
Select the correct answer, then press ‘Check Answer’ to see how you did.
Go!
Monoprints
We can use found objects in nature to make monoprints. A monoprint is a form of printmaking where the image can only be made once. This is different than most printmaking which allows for many originals.
For example, if an artist chooses to use a found natural object such as a leaf, they might cover it in paint and ink and apply it to paper once to create an impression.
What is an impression?
An impression is an image printed from an object. To make an impression, put ink on a flat object. Press a piece of paper against the object. Pull the paper away and check your impression. An impression can be printed several times!
When you create a monoprint you want to find flat objects. You can use leaves, ferns, and flowers to create your impressions. You might want to consider laying your pieces flat in a book and add weights overnight so that when you paint on the surface it is completely flat.
There are also ways to create monoprints without ink or paint.
Let’s explore the following video to discover how Laura makes a monoprint using only
Safety check
Laura advises to check with a parent or guardian before using any types of tools, such as a hammer, to create your work.
Student Success
Think-Pair-Share
What did you learn from Laura about the steps to follow to create a monoprint?
Record your thoughts using a method of your choice.
If possible, share with a partner.
Note to teachers: See your teacher guide for collaboration tools, ideas and suggestions.
Consolidation
Putting it all together

It’s time to try printmaking!
Materials Needed
Materials
Possible materials you might need for this learning activity:
- a blank sheet of paper or an art journal
- drawing materials such as pencils or crayons
- an electronic tablet for drawing
- any other art materials you like to use
Safety
Always be sure to do your safety checks before you do an activity.
Before you begin, check:
Student Success
Exploring digital creation options
When you are considering digital creation options, explore the variety of digital applications available!
Note to teachers: See your teacher guide for collaboration tools, ideas and suggestions.
Now it’s your turn to create! Press the following tabs to check out a variety of methods to create your art. Choose one of the following options to try out!
Create a detailed description of how you would create your monoprint artwork.
- What kind of colours would you use?
- What kinds of natural materials would you use?
If you choose to use leaves, would you want to include asymmetrical or symmetrical leaves?
Would you create a page using multiple leaves, or simple choose one specific leaf and use a variety of different colours to make it stand out?
Create a digital plan of how you would arrange the natural materials on a page. Include your colour choices, and the placement of your objects. You might choose to add pictures and words in your plan.
Use a digital program to create your art piece. Start by planning what kind of art piece you will create. How will you use the design elements discussed in the learning activity? Your artwork could be real or imaginary. Begin by planning how to include the design element.
Decide if you are using this design element or that design element.
Digitally create your piece using your plan! Remember to include details that create the feeling or the message you would like to communicate.
Possible materials needed:
- scissors
- books as paper weight
- paper
- liquid tempera paint
- newspapers
- paint brushes
- paper towels
- fallen leaves or flowers
- spray bottle
Press the following tabs to follow the steps to create your own printmaking art.
If possible, collect found natural objects such as leaves, and flowers.
Find pieces from nature that have different textures and can be laid flat. Examine your natural found objects.
- Are they symmetrical or asymmetrical?
- How will you arrange them on your page?

Safety check: Always ask a parent or guardian before using materials you find in your space. Ask for help attaching the materials and make sure to complete your printing block slowly and carefully.
You might also create a reusable printing block. Select a variety of recyclable materials and put them together by cutting and then stapling or gluing them onto cardboard.
If you use glue to attach your materials, you may need to wait a few hours or leave it overnight to dry before creating your print.
You can use other materials such as:
- fabric scraps
- cardboard
- textured cardboard (ex. some types of cardboard have a bumpy or rough inner part)
- string
- bottle caps
- glue or a stapler

Paint your flat objects or printing block and make sure you add enough paint to be able to transfer when printing.
Note: Tempera paint might transfer better than acrylic paint.


Before you print, dampen the paper with mist from spray bottle. The mist will let the paper more easily absorb the paint.

Place your prints onto your paper. You can paint multiple colours on you leaves, ferns and flowers. Once they are dry, you might add more details using pencil, pencil crayons or pen.

Portfolio
Review your learning
Record your responses using an art journal or another method of your choice.
- What did you most enjoy doing when making your print?
- What do you think is the most important thing in your print?
- Explain why you chose the specific materials you did to create print.
Reflection
How do you feel about what you have learned in this activity? Which of the next four sentences best matches how you are feeling about your learning? Press the button that is beside this sentence.
I feel…
Now, record your ideas about your feelings using a voice recorder, speech-to-text, or writing tool.