Minds On
Let's get started!
Explore the following artwork.
What do you notice about the medium? What kind of tools might the artist have used to create this work?
What do you notice about the designs the artist has created (i.e pattern, shape, line)?
Record your ideas using a method of your choice.

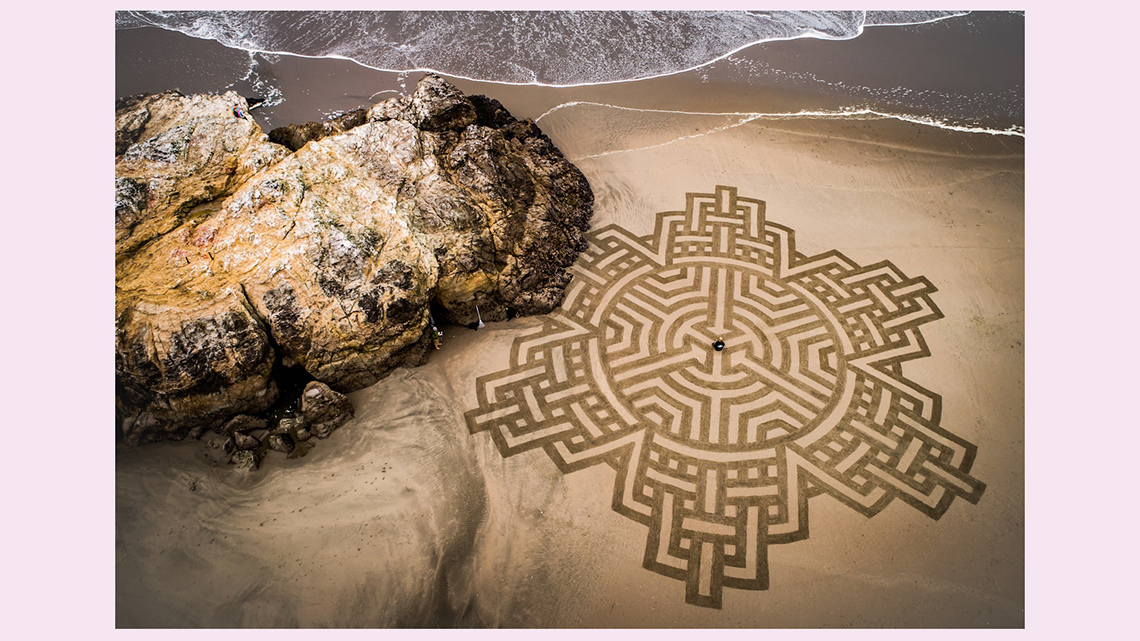
A carousel of two images. Image 1: Disk VI by Andres Amador, 2017. An aerial photograph of a large circle created on a sand beach. The circle is made up of a symmetrical pattern of curved and straight lines. The pattern starts from the center and moves outwards. A person sits at the center of the circle. In relation to the circle they are the size of an ant. Part of the circle is being erased by water. Image 2: Disk VI by Andres Amador, 2017. A second aerial photograph of a large geometric shape created on sand beach. The shape is made up of symmetrical patterns. The patterns start at the center and move outwards. A person sits at the center of the pattern. In relation to the pattern they are the size of an ant.
Action
Get ready, get set…
Who is Andres Amador?
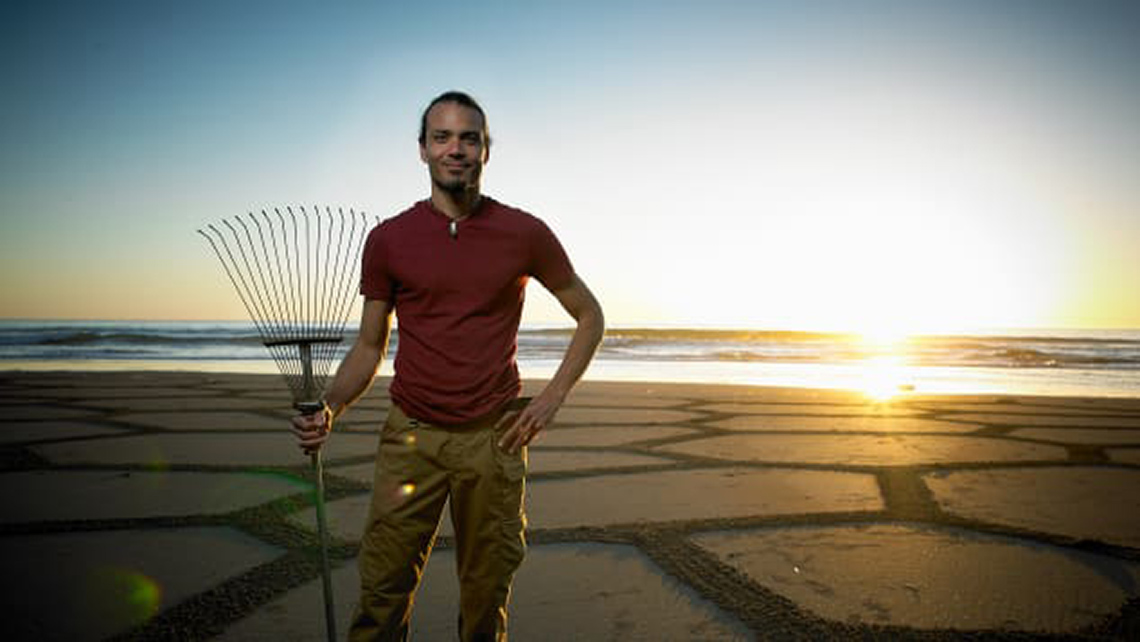
The artwork that you explored in the Minds On was created by the artist Andres Amador.
Explore this video entitled “Art that goes out with the tide” by KQED Arts and respond to the following questions using a method of your choice.
According to Andres Amador, what is an Earthscape artist?
Press ‘Possible Answer’ to learn what an Earthscape artist is.
Andres says that an Earthscape artist uses the materials of the earth, which will then go back to the earth. This means that there will be no waste created, and the artist is working to honour the earth.
What kind of tools does Andres Amador use to create his work?
Press ‘Possible Answer’ to learn what tools Amador uses to create his work.
He uses rakes to create artwork by the shore of the beach.
Andres Amador's Earthscape art is created on a large scale. While the audience can explore parts of the design while within it, it means that in order to experience the whole design, the audience would need to experience it from an aerial perspective.
Types of designs
Before beginning his work as a large scale Earthscape artist, Andres Amador worked in sculpture. This time in Amador’s career helped him to explore geometric shapes. As Amador transitioned to Earthscape artwork, he began to use nature as his inspiration.
“I have always been drawn to nature but could never figure out how to decipher what I was
seeing. And then I had an epiphany that in nature there are processes occurring and the
pattern we see is the result.”
- Amador Andres
Geometric shapes, repeating patterns, and radial symmetry are part of what we can find in nature.
Press ‘Definition’ to access a definition of geometric shapes.
Geometric Shape: A shape that is based on geometric figures. Squares, circles, and triangles are all geometric shapes.
Radial symmetry
For a design or object to show radial symmetry, the parts of a whole must be arranged around a central point. They are set at an equal distance apart. This creates balance.

Nature includes many examples of radial symmetry. For example, snowflakes, flowers, and even spiderwebs are created using the principle of radial symmetry.
Explore the following images from nature that use the principle of radial symmetry.
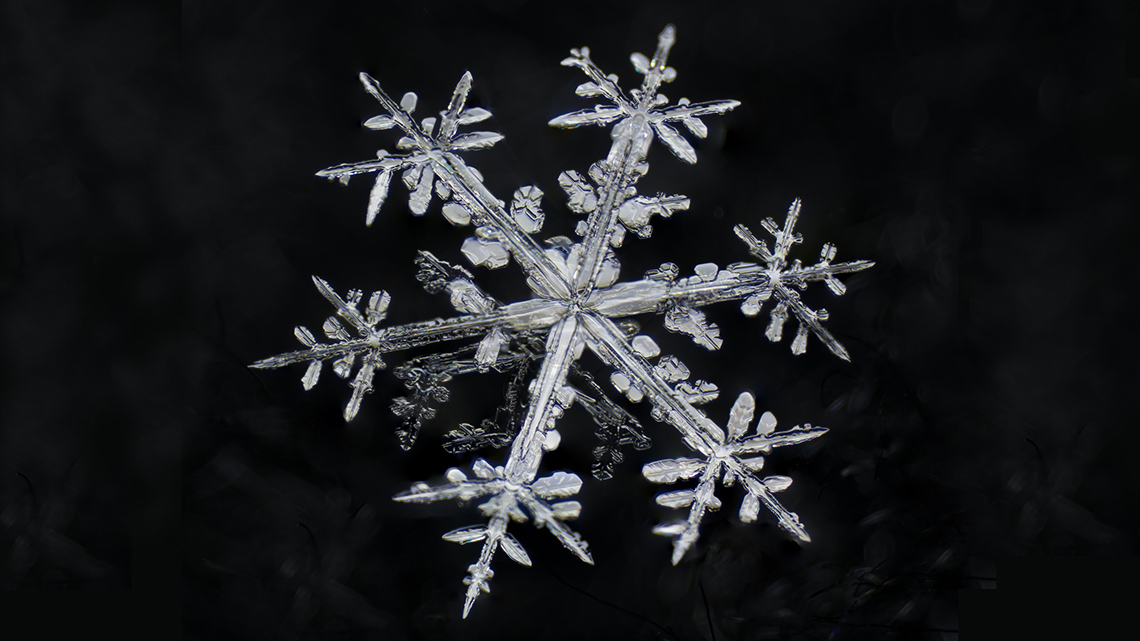
Snowflakes are each unique and are an example of radial symmetry in nature.
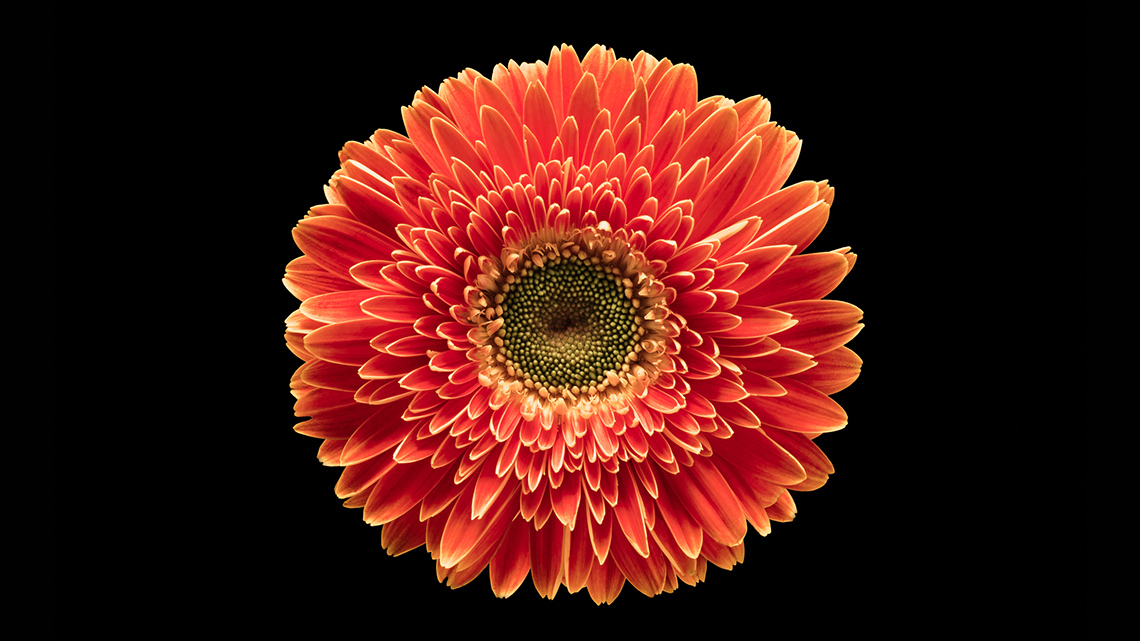
Many flowers grow into a shape that shows radial symmetry. While colour and scent are meant to attract insects for pollination, the design of a flower also attracts insects for pollination.
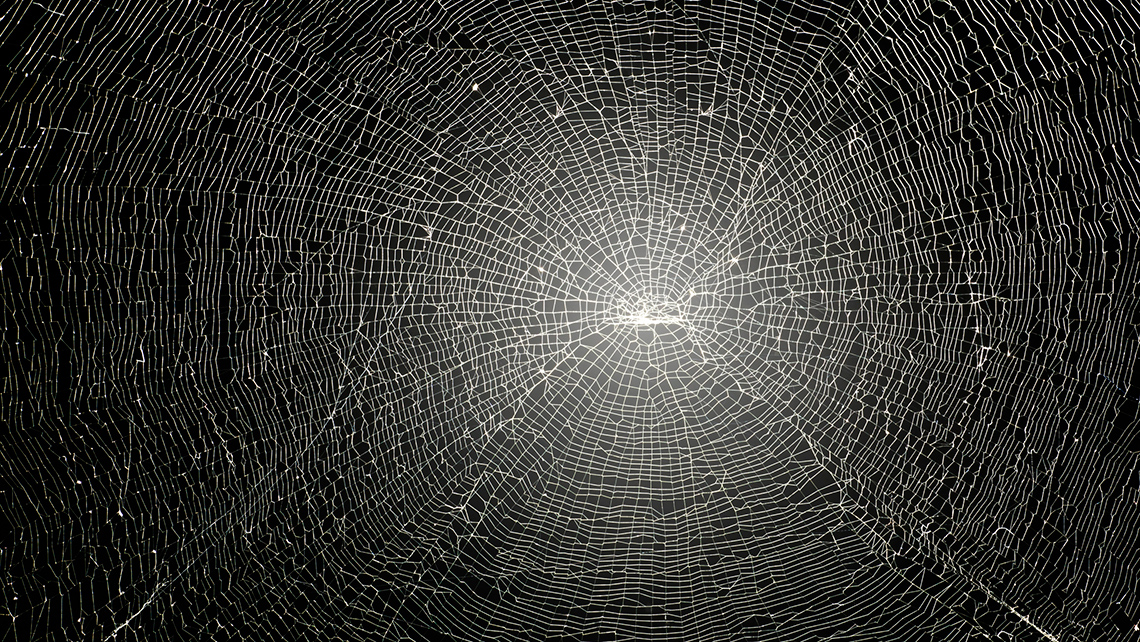
Spiderwebs are created using the principle of radial symmetry. It increases their strength and evenly distributes the “force of impact when a large insect becomes trapped.”
In artwork, radial symmetry is used to create balance. An artist might choose to use different types of geometric and organic shapes in their work. Radial symmetry creates order and is often used by artists to communicate a feeling of calm.
Let’s return to Amador’s Earthscape art. Explore the examples of Amador’s artwork below.
What kind of techniques did Amador use to create his designs?
What do you think Amador took inspiration from to create these two designs?
How do you feel as you explore these designs?
Record your responses using a method of your choice.
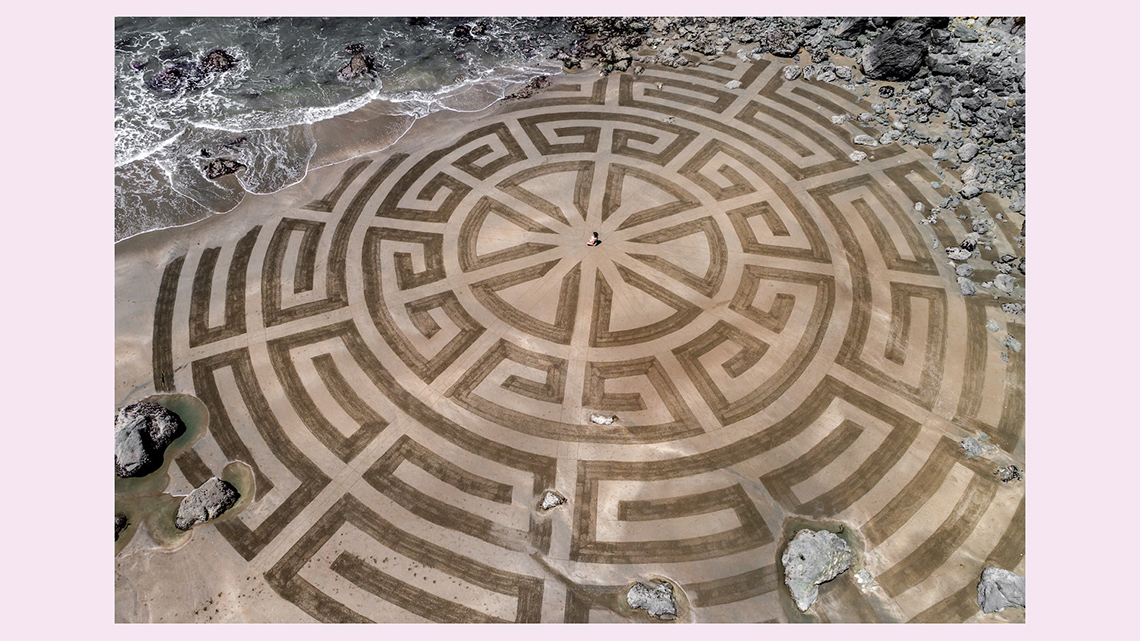

A carousel of two images. Image 1: Disk VI by Andres Amador, 2017. An aerial photograph of a large circle created on a sand beach. The circle is made up of a symmetrical pattern of curved and straight lines. The pattern starts from the center and moves outwards. A person sits at the center of the circle. In relation to the circle they are the size of an ant. Part of the circle is being erased by water. Image 2: Disk VI by Andres Amador, 2017. A second aerial photograph of a large geometric shape created on sand beach. The shape is made up of symmetrical patterns. The patterns start at the center and move outwards. A person sits at the center of the pattern. In relation to the pattern they are the size of an ant.
Press ‘Possible Answer’ to learn Amador’s techniques and inspirations.
Andres’ uses radial symmetry in both of his Earthscape artwork designs. He may have taken inspiration from flowers and/or snowflakes from nature. He uses straight and curved lines to create geometric patterns within the shapes
The artwork makes me feel calm and happy.
Consolidation
Putting it all together
Radial symmetry design
Time to create your own design using radial symmetry.
Explore the following examples to help guide your design.


Materials Needed
Materials you might need
Possible materials you might need for this learning activity:
- any type of paper (i.e. recycled, cardboard, construction, or white paper)
- drawing tools (i.e. pencil, eraser, markers, etc.)
Student Success
Exploring digital creation options
When you are considering digital creation options, explore the variety of digital applications available!
Note to teachers: See your teacher guide for collaboration tools, ideas and suggestions.
Safety
Before you begin, consider these safety precautions:
Now it’s your turn to create! Consider the following options to check out a variety of methods to create your art. Choose one option to try out.
Option 1: Description
Create an audio or written description of how you would like to create your design.
What kind of message or idea would you like to convey in your artwork?
What kind of pattern and/or colours would you include?
If creating a sculpture using natural or found materials, which materials would you include?
Option 2: Digital
Create your own digital radial symmetry design using a digital application.
What kind of message or idea would you like to convey in your artwork?
What kind of pattern and/or colours would you include?
Option 3: Materials
Create a drawing using radial symmetry.
Possible Materials:
- any type of paper (i.e. recycled, cardboard, construction or white paper)
- drawing tools (i.e. pencil, eraser, markers etc.)
Create your design drawing (part 1)
Use a geometric shaped object and trace that onto your paper using a pencil.

Fold your paper evenly in one direction (lengthwise).

Next, fold your paper in the other direction (widthwise)

Unfold, and select an object to trace in the middle of your paper. Use the creased lines of your paper to guide the placement of your object in the center of your paper.

Use your choice of other objects to create shapes at equal distance in the four corners of your design.

Continue to add details, using the creased lines to help you place the objects at equal distances.

You may use colour to complete your radial symmetry design.

Create your sculpture (part 2)
You may now recreate your design using natural or found objects. Before you begin, consider the following:
- What materials are around you that you would be allowed to use?
- Where would a good place be for you to create your design?
- How can you share your art with others?
- Land artists are all about preserving nature, highlighting the beauty of the place we are in. Do not take living things and destroy them to create your art. Only use leaves or flowers that have already fallen off the plant. If you move things and they are now out of place, like a large rock now being in the middle of a path, then you should put them back.

Using your drawing to guide you, select the materials you would like to complete your sculpture.
Begin by clearing a space you would like to use.
Start building your design from the center and slowly begin to build it outwards. Try to keep each part of your design equal distance from each other.
You might decide to modify your original drawing and add new details to your sculpture.
Once you have completed your sculpture, take a photo if possible. If working with found objects, put the objects away where you found them.
Portfolio
Track your progress
Reflect on your learning in this activity. Record your thoughts in your art journal or using another method of your choice.
What do you think about your final product?
What did you enjoy about your sculpture? What is something you did well?
Is there a part you would do differently if you try it again?
How would someone’s understanding of radial symmetry enhance their understanding of nature?
If possible, share your beautiful art and/or description with a partner! If you have a portfolio, you can put your art there to track your progress over time.
Reflection
As you read through these descriptions, which sentence best describes how you are feeling about your understanding of this learning activity? Press the button that is beside this sentence.
I feel…
Now, record your ideas using a voice recorder, speech-to-text, or writing tool.