Minds On
Understanding the grind

Think about a sport and/or activity you believe you are good at or are working towards being good at. Pause and reflect on the following questions:
- What were the steps you took to becoming good at the activity/sport?
- How much time and effort did/do you commit to the activity/sport?
- What are some strategies you can use to continue to improve on your own performance in the activity/sport?
Becoming good at something doesn’t happen overnight. It takes a lot of commitment and effort to become great at something. In this learning activity, you will learn a strategy to analyze your performance and work to improving a skill.
It’s in the numbers
One method that professional athletes and teams use to improve their game is to analyze their performance using mathematical models. You will be recording and analyzing your performance to improve on your technique.
Explore the following video entitled “Sports Statistician” to learn more about how a sports statistician uses math and data to help athletes improve their performance.
Action
Target practise
The aim of this learning activity is to improve the accuracy of our passing and shooting through the target activities of boccia and croquet. Strategies from target activities can be transferred over to sports from other categories of physical activity such as soccer, basketball, and baseball.
Before you explore the two activities, let’s go over the steps of how to send an object. You will practise and adapt these general steps to the activity you decide to practise.
Press the following tabs to access the phase movements for sending an object.
- Get into a position where you are balanced and stable ready to send the object. This can be achieved by starting with your feet shoulder-width apart. Keep your knees bent. Swing your kicking leg backwards to prepare to kick a ball or move one arm backwards to prepare for a throw while raising your other arm to maintain balance.
- Focus on the target. This can be keeping your attention on the target and/or facing your body towards the target.
- Apply force to the object you are sending in the direction of the target, adjusting your force depending on the distance of the target.
- Release the object and send it towards the target.
- Use your other body parts that are not sending the object to help you maintain balance and support. For example, this can mean swinging your arms in the opposite direction when kicking or shifting your weight in your feet for stability.
- Follow through in the direction of the target.
- Then go back to maintaining balance to prepare for next movement.
Before practising your sending with either one of the two activities, let’s complete a safety check and warm up.
Safety
Before you begin, consider these safety precautions:
Warm Up
Warm up
Let’s do a warm up before we get into our main activities! Warm ups will help you better perform a movement/activity while also greatly reducing your chance of injury.
Depending on what activities you are performing, choose one of the following warm ups, or you may do a combination of them. Press the following tabs to access the warm ups.

- Jogging: Let’s start off with a relaxed jog for 5 minutes. You can jog in one place or back and forth in your space.
- Jumping jacks: Now do 10 jumping jacks! To perform a jumping jack, position your body straight up with hands to your sides. Then jump and spread legs apart and bring arms above the head. After that, jump back into starting position.
- Toe touch: Time to touch our toes! Have your body straight up. Then lean and bend forward and try your best to touch your toes. Hold the position for 10-20 seconds, return to straight upward position and repeat 10 times.
- Sit-up: Now do 10 sit-ups! To set-up a sit-up, lay on your back and bend your knees to form a ‘V’ shape with your legs. Bend your upper body towards your knees to perform the sit-up.
- Mountain climber: Finally, do the mountain climber for 60 seconds. To perform the mountain climber set yourself up in the push up position, then bring each knee forward as if you were climbing.

- Neck Tilts and Rotations: Slowly tilt your head side to side 10 times and then slowly and carefully rotate your neck 10 times in each direction.
- Arm Circles: Straighten your body and put your arms straight out to the sides. Then start forming circles in one direction, start with small circles and work your way up to large circles. Do this 10 times and then repeat with the opposite direction.
- Chest Expansions: Straighten your body and put your arms out straight to the sides with palms of hand facing forward. Bring your hands together in a clapping motion slowly, then return to the starting position. Do this 10 times.
- Wrist Circles: Clasp your wrists together and start to circle your wrists in one direction. Do this 10 times and then repeat with the opposite direction.
- Shoulder Rolls: Put your arms to the side keeping your posture straight. Rotate your shoulders forward to make a circle. Do this 10 times and then repeat with the opposite direction.

- High Knee Jog: Standing straight with feet shoulder-width apart perform a jog but raise your knees to about waist level. Do this for two minutes.
- Side-to-Side Hops: Standing straight with hands to side and feet hip-width apart hop side to side quickly. Do this for two minutes.
- Lunges: Stand straight with feet hip-width apart and arms grabbing the side of your hips. Take a step forward and bend your knees so that you form two 90-degree angles with your legs with one leg forward and one leg behind. Hold the position for 20-30 seconds then switch legs and repeat. Do this three times.
- Squat Side Kick: Go into a squat position so that your feet are shoulder-width apart and your hips are back. Then gradually get up and shift your weight towards one leg so that you can lift your other leg out to the side in a slow kick motion. Then return to the squatting position. Do this 10 times for each leg.
- Lateral Leg Swing: Stand upright, holding onto a wall with one hand for support and the other hand placed on the side of your hip. Swing one leg in front carefully across your body from side to side for 10 times. Then repeat with other leg.
Activity one: Boccia
Boccia is a target sport that is one of the only two Paralympic sports that does not have an equivalent in the Olympics. Belonging to the family of games known as boules, it is similar to lawn bowls or bocce. The sport was designed for individuals diagnosed with cerebral palsy and is now played professionally by individuals with various motor functioning difficulties. The objective of the game is to get your ball closest to the jack.
Check out the following video entitled “Boccia Game” to explore an example of how boccia can be played.
Press the following tabs to access information about how to set up and play a boccia activity.
The following is a list of equipment that is required for this activity:
- Six balls approximately the size of your hand or a sock rolled into a ball. If you are competing with another person/team, you will need twelve balls. If you are competing with another person/team, you will need twelve balls.
- a target such as another ball, bean bag, pylon, or bottle to act as the jack
- a measuring tape or you can use a string and/or ruler
- tape or chalk to mark the court layout (optional)
If you would like to mark the court layout, explore the following diagram.
 Description
A diagram of a boccia court. The court size is 6 metres by 12.5 metres. The shorter side of the court is divided into 6 rectangles that are 1 metre by 2.5 metres, and are labelled shooting boxes. These boxes are where the players are located. Directly in front of the players is the invalid target area, which is 1.5 metres at the centre and expands to 3 metres at either side. The next section is the valid target area, which is a pentagon shape that takes up the remaining court. The target is placed 5 metres from the back of the court, and is known as the jack.
- If you have set up the court like a typical boccia game, select one of the shooting boxes to shoot from. You must stay within this boundary when shooting your ball. If you did not set up the court in that manner you may select a specific location to stay in. Typical boccia players will throw from the six diverse boxes, but we are trying to improve aim so staying in one place will allow you to compare your performance more easily.
- Throw the jack within the valid target area or at least 1.5 metres away from you.
- Now you will throw the balls one by one at the jack, trying to get it as close as possible to it. You will have six throws. You may throw another ball at a ball you previously threw to get that ball closer to the jack.
- Measure the distance between the jack and the ball that is closest using the measuring tape or string.
- If you are with another person or a group of people, you can compete against each other and see who can get their ball closer to the jack at the end.
- Tip: When aiming and throwing the ball, you may want to swing your arm back and forth a few times with the ball before sending the object towards the jack.
Match up!
Now that you have learned about the boccia activity, try and match the phase movements for sending a ball.
In the following matching activity, choose the word that best fits the image!
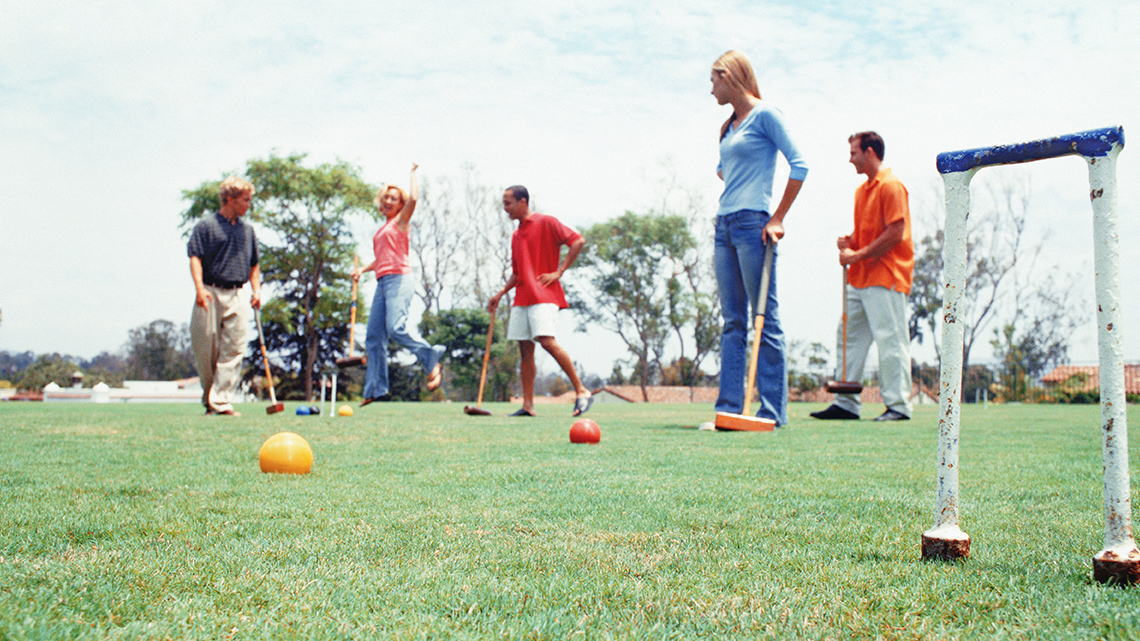
Activity two: Croquet ball
Croquet is a target sport where participants hit balls with a mallet through wickets (hoops/gates that are placed around a grass court).
Did You Know?
Did you know?
Croquet originated from paille-maille (paille is French for ball and maille is French for mallet) which was invented in France as early as the thirteenth century. It was popularized in England and is now played all over the world.
You will learn how to play a modified version using your feet instead of a mallet.
Press the following tabs to access the information for this croquet activity.
Here’s a list of the equipment you will need for this activity:
- a ball
- At least eleven pylons, bottles, or/and cans that can act as wickets. Please note that you need an odd number as one will act as the finishing post while the others are paired to form the wickets. You can have more if you want a bigger course. If you are playing on grass or sand, you may be able to use sticks or bend some metal clothing hangers to act as the wickets.
In terms of set-up, put your wickets in the desired shape you would like your course to be. The following is an example of how you may want to set up your course.

An image of an example croquet set up. There are 9 wickets set up in a figure eight pattern from west to east. The wickets are lined up on a northern line, a centre line, and a southern line. The centre line has two wickets on the west side, one wicket in the middle, and two wickets on the east side. The northern line has one wicket placed between position of the west and middle wickets on the centre line, and one wicket placed between position of the middle and east wickets on the centre line. The southern line has one wicket placed between position of the west and middle wickets on the centre line, and one wicket placed between position of the middle and east wickets on the centre line. The wickets are set up so the player moves from the west to the east in a diagonal pattern, and then returns to the west using the opposite side’s wickets.
- Kick the ball going through all the wickets from the starting wicket to the finishing post.
- Record the number of kicks it took to get through the whole course.
- You will have to practise adjusting the force and direction in which you kick the ball to minimize the number of kicks needed to finish the whole course.
- If you are with another person or a group of people, you can compete against each other and see who can get their ball through the entire course with the least number of kicks.
Match up!
Now that you have learned about the croquet activity, try and match the phase movements for sending a ball in croquet.
In the following matching activity, choose the word that best fits the image!
You may use the following interactive bar graph based on your eight recorded results.
Cool Down
Cool down
Now it’s time for a cool down! It’s important to allow your body to gradually return to a resting state after intense physical activity.
Remember to perform your safety check before you begin.
Depending on what activities you are performing, choose one of the following cool downs, or you may do a combination of them.
Press the following tabs to access the cool downs.

- Jogging: Begin with a jog and transition to a walk. Do this for 2-5 minutes.
- Wide Toe Touch: Now do wide toe touches for 60 seconds. To perform a wide toe touch, position your body in the shape of a star, then bend forward and reach with one arm to touch the opposite foot. The other arm which is on the same side as the foot is pointed upwards. Hold this position for 10-15 seconds, then return to the starting position and repeat on the opposite side.
- Quad Stretch: Stand up straight and shift your weight to one leg. Then lift your other leg backwards towards your butt and grab it with the arm on the same side. Hold it for 20-30 seconds and repeat with the other leg. Do this 5 times for each leg.
- Child’s Pose: Do the child pose for 30 seconds. To perform the child pose, get down on your knees and bend your body forwards stretching your arms out. Your forehead should be resting on the floor.
- Abdominal Stretch: Now, do an abdominal stretch for 30 seconds. To perform the abdominal stretch, lie face down with legs straight up and place your arms in a push up position. Push upwards and slowly lift your torso holding the position.

- Shoulder Stretch: Bring one arm across your chest bend your other arm to help support it into position. Hold the position for 30 seconds and then do the opposite side. Repeat three times.
- Triceps Stretch: Bend one arm up and behind towards your shoulder blade. Use the other arm to help support it into position. Hold the position for 30 seconds and then do the opposite side. Repeat three times.
- Overhead Stretch: With your body straight interlock your fingers and bring your arms above your head. Have your palms facing away from you. Hold the position for 60 seconds.
- Torso Stretch: With your body straight fold one arm behind your back and use the other arm to help support it into position. Then bend your torso towards one side. Hold the position for 30 seconds and then do the opposite side. Repeat three times.
- Chest-Cross Arm Swing: With your body straight put your hands horizontally straight out to the sides and then swing your arms to make an ‘X’ shape back and forth for 60 seconds.

- Flutter Kick: Lie on your back with your hands to the side. Lift your legs and perform a kicking motion, alternating the legs back and forth. Do this for one minute.
- Side-Lying Leg Lifts: Lie on your side with one arm supporting your head and one arm bend in front supporting your body in position pushing against the ground. Lift your leg slowly and gradually return it back. Do this five times and then switch to the other leg.
- Single Leg Hug: You can do this lying on your back or standing straight up. With your arms hug your thigh to bring one knee towards your chest. Hold the position for 20-30 seconds then gradually release and switch sides. Repeat three times.
- Butterfly Stretch: Sitting on the floor bring both feet together so they are touching. Use your arms to safely move your knees towards the floor. Hold the position for 20-30 seconds and then release gradually. Repeat three times.
- Hip Flexor Stretch: Kneel on one of your knees and bend your other leg in front of your body at approximately a 90-degree angle. Shift your weight forward until you feel a stretch. Hold the position for 20-30 seconds and switch sides. Repeat three times.
Consolidation
Analyzing the numbers

Reflect on the following questions using the data you collected in the Action section:
- Is there a trend in the data you collected? Did your performance improve, stay the same, fluctuate, or reduce?
- What are some factors that affected your performance?
- How does practising skills in target activities transfer over to shooting and/or passing skills?
- What are some techniques that were helpful for the activity that you did that could transfer over to another sport? Provide one or two examples.
Record your answers in a method of your choice.
Demonstration

You learned and practised sending an object to a target. Now it’s time to demonstrate your skills! You will explain how to send an object in the activity you chose to do in the Action section. You will also provide tips you have for others to improve their performance.
Choose one of the following or a method of your choice to demonstrate your skills:
- video/audio clips
- slideshow
- poster
- brochure
- comic strip
- webpage
Use the following checklist to help ensure that you have covered all that you need in your demonstration.
Demonstration success criteria
Reflection
As you read the following descriptions, select the one that best describes your current understanding of the learning in this activity. Press the corresponding button once you have made your choice.
I feel…
Now, expand on your ideas by recording your thoughts using a voice recorder, speech-to-text, or writing tool.
When you review your notes on this learning activity later, reflect on whether you would select a different description based on your further review of the material in this learning activity.