Minds On
Explore
Explore this video entitled “Secret Code” to learn more about step-by-step procedures and coding instructions.
Brainstorm
What did you explore?
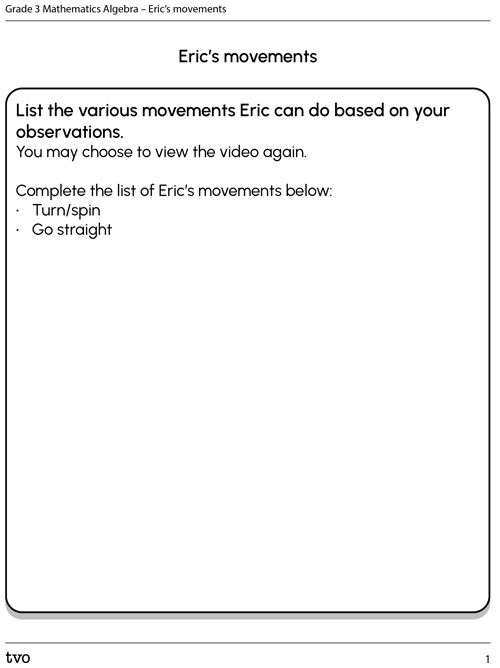
List the various movements Eric can do based on your observations.
You may choose to explore the video again.
Complete the list of Eric’s movements:
- turn/spin
- go straight
Complete the Eric’s movements in your notebook or use the following fillable and printable document. You can also use another method of your choice.
Action
Movements

Eric can do many movements as he followed the instructions to find the clues and the treasure.
Imagine having your own mini robot.
You will write instructions for your own mini robot to make its way through a grid, just like Eric did.
Instructions
Our mini robot can only do three main movements.
Check out the different movements and their symbols:
| Movement | Symbol |
|---|---|
| Forward | Fwd |
| Right Quarter Turn | RT |
| Left Quarter Turn | LT |
Right quarter turn
Check out what a right quarter turn looks with this robot car:

Left quarter turn
Check out what a left quarter turn looks with this robot car:

Your mini car robot
Your mini car robot must be able to move from the starting point to the green space square on the grid.

Task 1: Follow instructions
One way to get to the green space is to follow the instructions.
Try following the instructions - you should end up on the ending point, the green space.
If you don’t end up on the green space, go back and try following the instructions again.
| Instructions |
|---|
|
Task 2: Which two?
There are four different ways to get to the end space (green square).
But – only 2 of the following sets of instructions will work.

Which two sets of instructions will work?
Remember to test out each set of instructions before making your decision.
| Instructions | |||
|---|---|---|---|
| Set A | Set B | Set C | Set D |
|
Fwd Fwd Fwd Fwd LT Fwd Fwd Fwd Fwd |
Fwd RT Fwd LT Fwd RT Fwd LT Fwd RT Fwd LT Fwd RT Fwd |
RT Fwd Fwd Fwd Fwd LT Fwd Fwd Fwd Fwd |
RT Fwd Fwd Fwd Fwd RT Fwd Fwd Fwd Fwd |
Select the correct answer, then press ‘Check Answer’ to see how you did.
Task 3: Repeated instructions
In Task 1, we saw a set of instructions that helped your mini robot navigate to the green space:
| Instructions |
|---|
|
As you can see, there were several instructions that were repeated.
A repeated event in coding is when something happens over and over again.
The repeat might involve one line of code or instruction, or multiple lines of code or instructions.
Let’s adjust these instructions to include a repeat.
We see that the Fwd repeated 4 times, followed by a right quarter turn, and then repeated another 4 times.
We’ve included the number of times the instruction is repeated by using a number:
Instructions with Repeat(s)
Repeat 4 [Fwd]
RT
Repeat 4 [Fwd]
Brainstorm
Did you notice?
Reflect on the following questions:
- Did you notice how many fewer instructions we needed when using a repeat?
- Compare the number of lines of instructions required with no repeat and with a repeat.
Record your ideas in a notebook or a method of your choice.
Let’s add a repeat to Set B from Task 2.
| Instructions | |
|---|---|
| Original Set B | Set B with Repeats |
|
Fwd RT Fwd LT Fwd RT Fwd LT Fwd RT FWD LT Fwd RT Fwd |
Rep 3 [Fwd RT Fwd LT] Fwd RT Fwd |
Notice that 4 instructions are repeated in the orange text, so we need to include 4 instructions in our repeat.
The four instructions that are repeated are: Fwd RT Fwd LT
The orange text is the instruction that is repeated 3 times. So there are 4 instructions repeated 3 times, followed by one section that does not repeat.
Your turn!
Try adding a repeat for Set C from Task 2.
Complete the Set C Repeated Instructions Activity in your notebook or use the following fillable and printable document.
Press the ‘Activity’ button to access the Set C Repeated Instructions Activity.
Consolidation
Obstacles

The mini robot is now faced with two obstacles to navigate around. They are two large boulders or rocks on the grid.

There are two sets of instructions that are supposed to help the mini robot get to the green space.
But each has one error or a bug in the instructions.
Student Tips
Did you know?
A bug is an error in the code.
When we find errors in our code or instructions and fix them, we call this debugging.
Debugging
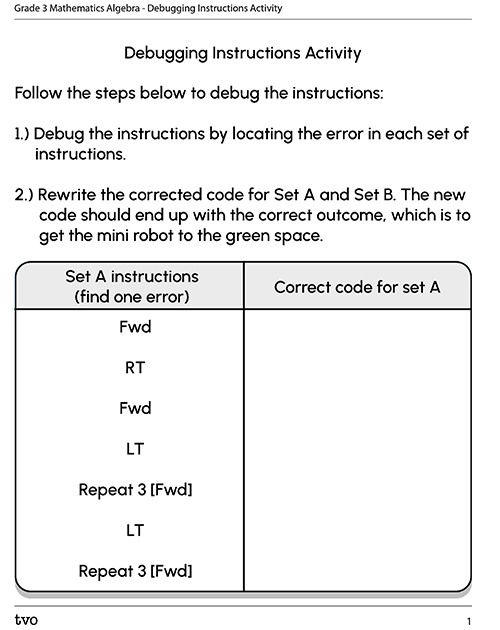
Let's use the mini robot grid provided in this section, and follow the steps to debug the instructions:
- Debug the instructions by locating the error in each set of instructions.
- Rewrite the corrected code for Set A and Set B. The new code should end up with the correct outcome, which is to get the mini robot to the green space.
- Create your own set of instructions to get the mini robot to the green space. Remember to use a repeat where possible.
Complete the Debugging Instructions Activity in your notebook or use the following fillable and printable document. You can also use another method of your choice.
| Set A instructions (find one error) | Correct code for set A |
|---|---|
|
Fwd RT Fwd LT Repeat 3[Fwd] LT Repeat 3[Fwd] |
| Set B | Correct code for set B |
|---|---|
|
RT Repeat 4 [Fwd] LT Repeat 3[Fwd] |
| My instructions |
|---|
Press the Activity button to access the Debugging Instructions Activity.
Activity(Opens in a new tab)Reflection
How do you feel about what you have learned in this activity? Which of the next four sentences best matches how you are feeling about your learning? Press the button that is beside this sentence.
I feel...
Now, record your ideas about your feelings using a voice recorder, speech-to-text, or writing tool.