Minds On
The triangle
The longest side of a right triangle is called the hypotenuse. It is the side that is opposite, or directly across from the right angle.

A right-angled triangle labelled A B C. The length of side A C is labelled leg. The length of side C B is also labelled leg. Angle C is a right angle. The side opposite to Angle C is side A B and is labelled the hypotenuse.
Brainstorm
What do you think?
After exploring the triangle, consider the following questions:
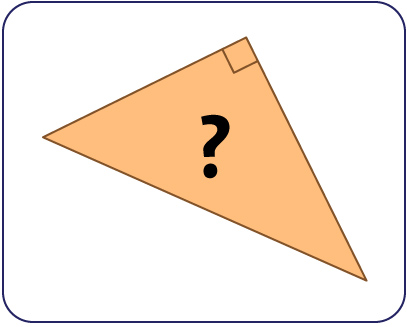
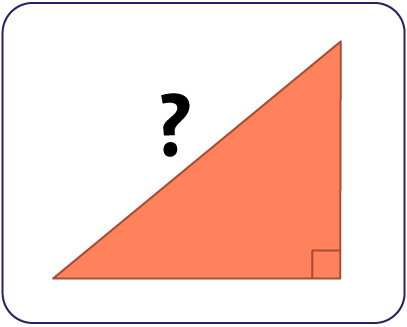
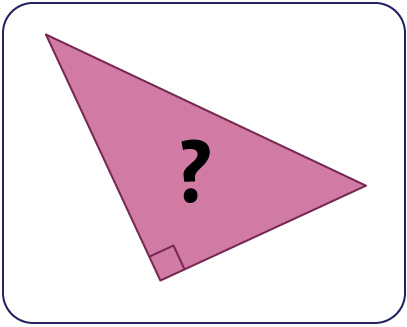
- What if the triangle was reflected or rotated?
- Does this change where the hypothenuse is?
If you would like, you can complete this activity using TVO Mathify. You can also use your notebook or the following fillable and printable document.
Press the 'TVO Mathify' button to access this resource and the ‘Activity’ button for your note-taking document.
TVO Mathify (Opens in a new window) Activity (Open PDF in a new window)Press 'Let's check!' to access a response to the "What Do You Think?" activity.
- If the triangle is rotated or reflected, the right angle in the triangle will change orientation or its location.
- The two legs of the right angle that make up the right triangle can never be the hypotenuse.
- Recall that the hypotenuse of the right triangle is always opposite, or directly across from the right angle.

A right-angled triangle labelled X Y Z. The length of side X Y is labelled leg. The length of side Y Z is also labelled leg. Angle Y is a right angle, which is opposite to side X Z, and labelled the hypotenuse.
Dissecting squares
Student Success
Think-Pair-Share
If possible, with a partner, consider the following steps in order to determine the relationship between the area of two squares, located on the sides of a triangle, and the square located beside the hypotenuse.

A right-angled triangle is in the centre and there are squares connected to each side of the triangle. One square is along the base of the triangle, which is labelled “a.” On the side of the right-angle there is a square, which is labelled “b.” The last square is along the length of the right triangle’s hypotenuse, which is labelled “c.” Square C is the largest, Square B is in medium sized, and Square A is the smallest.
For this activity, use a piece of paper, a digital tool, or a method of your choice.
Note to teachers: See your teacher guide for collaboration tools, ideas and suggestions.
Step 1
- Create a right-angled triangle.
- Make sure that the angle is 90 degrees for it to be a true right-angled triangle. Label the sides a, b, and c, where c is the hypotenuse (opposite from the right angle).
- Draw squares on each of the 3 sides of the triangle.
A right-angled triangle is in the centre and there are squares connected to each side of the triangle. One square is along the base of the triangle, which is labelled “a.” On the side of the right-angle there is a square, which is labelled “b.” The last square is along the length of the right triangle’s hypotenuse, which is labelled “c.” Square C is the largest, Square B is in medium sized, and Square A is the smallest.
Step 2
Draw through the square:
- a line that extends from one side of the square on c through the square on b
- a line that is parallel to side c and passes through the vertex opposite side c

A right-angled triangle is in the centre and there are squares connected to each side of the triangle. One square is along the base of the triangle, which is labelled “a.” On the side of the right-angle there is a square, which is labelled “b.” The last square is along the length of the right triangle’s hypotenuse, which is labelled “c.” Square C is the largest, Square B is in medium sized, and Square A is the smallest. Two lines are drawn on squares b and c. There’s a line that extends one side of the square on c through the square on b. There is another line that is parallel to side c and passes through the vertex opposite side c.
Step 3
Imagine all three squares were removed, and the square from side b was split into pieces based on the lines added. Then, the pieces in square a and square b were fit into square c.
A right-angled triangle is in the centre and there are squares connected to each side of the triangle. One square is along the base of the triangle, which is labelled “a.” On the side of the right-angle there is a square, which is labelled “b.” The last square is along the length of the right triangle’s hypotenuse, which is labelled “c.” Square C is the largest, Square B is in medium sized, and Square A is the smallest. Two lines are drawn on squares b and c. There’s a line that extends one side of the square on c through the square on b. There is another line that is parallel to side c and passes through the vertex opposite side c.
Now let's reflect on some questions!
If you would like, you can complete the next activity using TVO Mathify. You can also use your notebook or the following fillable and printable document.
Press the ‘TVO Mathify’ button to access this resource and the ‘Activity’ button for your note-taking document.
TVO Mathify (Opens in a new window) Activity (Open PDF in a new window)Adding squares
It is important to understand the relationship between the sides that you explored in the Minds On task.
- First, you put a square on each of the sides of a right triangle.
- Then, you found the sum of the areas of each of the squares on the sides that are the legs of the right angle.
- Lastly, you ended up with a sum of the two squares that equal to the area of the square (which was on the hypotenuse).
Exploring the squares and triangles
Explore the following:

This is a right-angled triangle in the centre labeled a, b, and c, where c is the hypotenuse. There are squares connected to each side of the triangle. On the side “a” there is a connected square which has an area of “a squared.” Square A has an area of 9 units. On the side “b” there is a connected square which has an area of “b squared.” Square B has an area of 16 units. The third and last square is connected to side “c.” This squared is on the triangle’s hypotenuse, and has an area of “c squared.” Square C has an area of 25 units.
In this image, there are 3 squares.
One on each of the two legs, and on the hypotenuse.
- The square connected to leg 1 has an area of 9 units.
- The square connected to leg 2 has an area of 16 units.
- The area of the square connected to the hypotenuse is 25 units.
When we add the two squares attached to the legs, 9 + 16, we know that it equals to 25.
This sum is equal to the area of the square attached to the hypotenuse.
Labelling right triangles
The longest side of a right triangle is called the hypotenuse. It is always the side that is opposite, or directly across from the right angle. It won’t ever be a part (a leg) of the right angle.
Student Success
Labelling Triangles
When labelling any triangle, you start with labelling the vertices in capital letters. Then you label each of the opposite side lengths with the same letter, but in lowercase. This is one way you may notice triangles being labelled.
Example: In the following triangle the vertex that is a right angle is labelled with a uppercase C. The side opposite to it that connects vertex A and vertex B is labelled with a lowercase c.

A right-angle triangle with vertices labelled capital A, capital B, capital C. The sides opposite to each of the vertices are labelled lowercase a, lowercase b, lowercase c.
Note to teachers: See your teacher guide for collaboration tools, ideas and suggestions.
Let’s practice finding the hypotenuse in right triangles.
If you would like, you can complete this activity using TVO Mathify or a method of your choice. You can also use your notebook or the following fillable and printable document.
Press the ‘TVOMathify’ button to access this resource and the ‘Activity’ button for your note-taking document.
TVO Mathify (Opens in a new window) Activity (Open PDF in a new window)Select the correct answer, then press “Check Answer” to see how you did.
Press 'Let's check!' to access the labelled hypotenuses.


The Pythagorean theorem

When the triangles from the two side squares were placed in the space of the square of the hypotenuse, you were proving the Pythagorean theorem!
Student Tips
Did you know?

The Pythagorean theorem was a discovery made by Pythagoras, a Greek philosopher who made important developments in mathematics.
He realized that the area of the square, whose side is the hypotenuse, is equal to the sum of the areas of the squares on the other two sides (the legs of the right-angle triangle).
We can record this theorem as the following formula:
Brainstorm
Pause and reflect
What do you think this formula means?
Let’s apply the formula
If you would like, you can complete this activity using TVO Mathify or a method of your choice. You can also use your notebook or the following fillable and printable document.
Press the ‘TVOMathify’ button to access this resource and the ‘Activity’ button for your note-taking document.
TVO Mathify (Opens in a new window) Activity (Open PDF in a new window)Press on the steps to access Triangle 1’s calculations.
Use the formula:
Plug in the variables you know:
Simplify the algebra for the sides you know and add:
Flip the unknown side and the number to make it easier to calculate for the unknown value:
Recall that in order to get by itself we must perform the opposite operation.
The opposite of squared is taking the square root:
Simplify both sides, the squared and the square root cancel. Now, take the square root on the right:
Therefore, side c is 5.
Press ‘Let’s check!’ to access Triangle 2’s calculations.
4 81
85
Calculate the side length
The Pythagorean theorem can be used to solve for any of the measurements in the formula by substituting in the known values, and rearranging the equation to solve for the unknown value.
If you would like, you can complete the next activity using TVO Mathify or a method of your choice. You can also use your notebook or the following fillable and printable document.
Press the ‘TVOMathify’ button to access this resource and the ‘Activity’ button for your note-taking document.
TVO Mathify (Opens in a new window) Activity (Open PDF in a new window)Press ‘Let’s check!’ to access Triangle 1’s calculations.
Press ‘Let’s check!’ to access Triangle 2’s calculations.
City travel using Pythagorean theorem

Three cities are connected by roads of different distances in kilometres. The three cities create a right-angled triangle. City 2 is at the right angle of the triangle. City 1 is 200 kilometres north of City 2. City 3 is 300 kilometres east of City 3. What is the distance between City 1 and City 3?
You are in City #1 and need to get to City #3.
There are two possible routes to get to City #3; either along the hypotenuse, or down and then across the legs.
- Predict which route is the fastest, and explain your decision.
- Use the Pythagorean theorem to prove your answer and determine the distance from City #1 to City #3.
If you would like, you can complete this activity using TVO Mathify or a method of your choice. You can also use your notebook or the following fillable and printable document.
Press the ‘TVOMathify’ button to access this resource and the ‘Activity’ button for your note-taking document.
TVO Mathify (Opens in a new window) Activity (Open PDF in a new window)Rearranging the formula
Recall that we can use the Pythagorean theorem to solve for any of the measurements in the formula by substituting in the known values, and rearranging the equation to solve for the unknown value.
A ladder measuring 10 metres is propped up against the side of a building, with the base at a distance of 5 metres away from the building. The height of the window, h, that the ladder is reaching is unknown.

A ladder measuring 10 metres is propped up against the side of a building, with the base at a distance of 5 metres away from the building. A dotted line is included from the top of the ladder to the bottom of the wall and from the bottom of the wall to the bottom of the ladder. A square between the wall and the ground indicates a 90-degree angle.
What is the height of the window that will be reached? Solve for the value of h.
In this question, even though we already have the measurement for the hypotenuse, we can rearrange the formula to solve for the lengths of the right-angled triangle that we need to solve.
Record all of your steps and describe your procedure.
If you would like, you can complete this activity using TVO Mathify or a method of your choice. You can also use your notebook or the following fillable and printable document.
Press the ‘TVO Mathify’ button to access this resource and the ‘Activity’ button for your note-taking document.
TVO Mathify (Opens in a new window) Activity (Open PDF in a new window)Reflection
As you read the following descriptions, select the one that best describes your current understanding of the learning in this activity. Press the corresponding button once you have made your choice.
I feel...
Now, expand on your ideas by recording your thoughts using a voice recorder, speech-to-text, or writing tool.
When you review your notes on this learning activity later, reflect on whether you would select a different description based on your further review of the material in this learning activity.
Connect with a TVO Mathify tutor
Think of TVO Mathify as your own personalized math coach, here to support your learning at home. Press ‘TVO Mathify’ to connect with an Ontario Certified Teacher math tutor of your choice. You will need a TVO Mathify login to access this resource.
TVO Mathify (Opens in a new window)