Minds On
The “potential” in fire
What is fire, anyway?
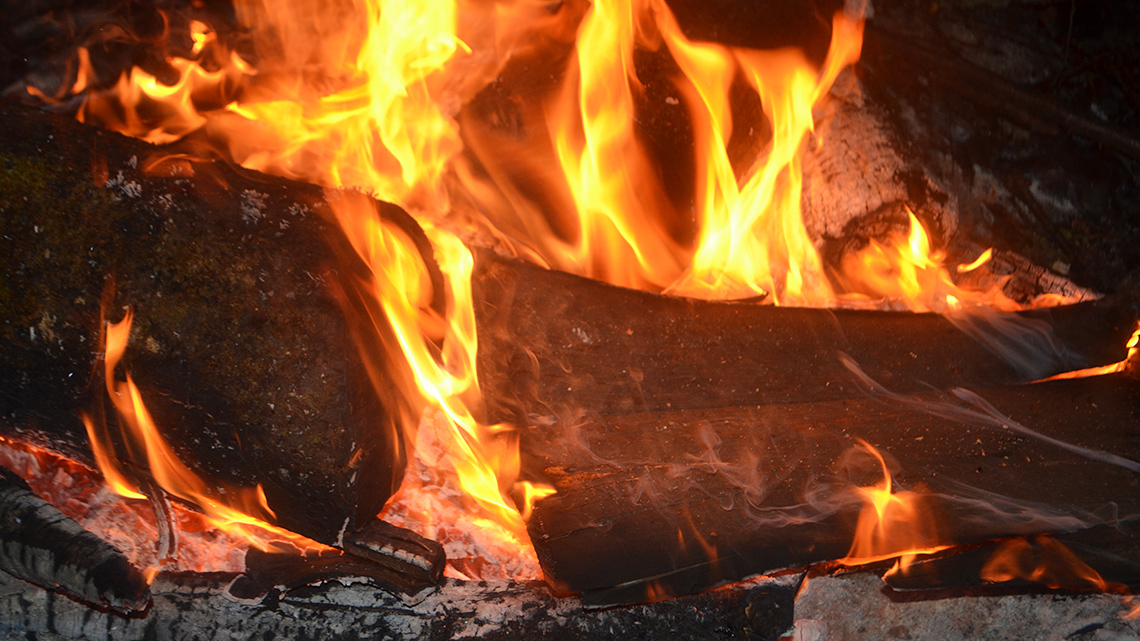
Fire is created when extreme heat forces gases to escape from a burning object. It happens when oxygen from the air combines with something else in a certain way – in this case, by heating up that “something else” to a high temperature called the “ignition point.” This is when things actually burn.
The creation of fire requires different types of energy. For example, a piece of wood contains a certain amount of potential energy stored inside itself. Igniting the wood converts the potential energy into heat energy. When the gas being released from the wood becomes hot enough, it will create that familiar flame known as fire.
Press ‘Definitions’ to learn the meaning of the words potential energy and heat energy.
Potential energy: This can be defined as energy “at rest.” Some examples of potential energy include a stretched elastic/spring or a rock at the top of a mountain. There is possibility or potential for energy to be used.
Heat energy: This is the energy that is transferred between objects or systems. One example of heat energy is placing a cool pan down on a hot burner. The heat is transferred from the burner to the pan which then heats up.
Humans have known how to control fire for nearly 1,500,000 years and have perfected different methods over time. An early method was to twirl one piece of wood against another until the wood heated up enough to ignite into flames, or to strike a hard rock or mineral against another to create sparks.
Fire is still commonly used as a main method of cooking food around the world. Explore the following images and descriptions for examples of how humans around the world use fire to prepare meals.
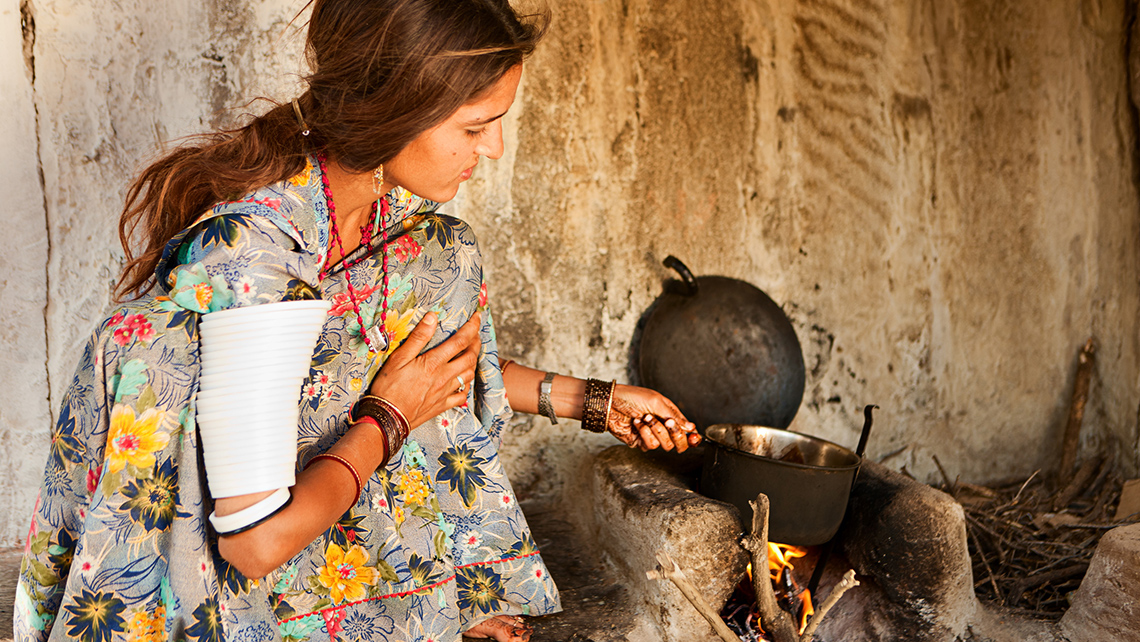
Water can be boiled by heat off an open fire (Bishnoi village, Rajasthan, India).
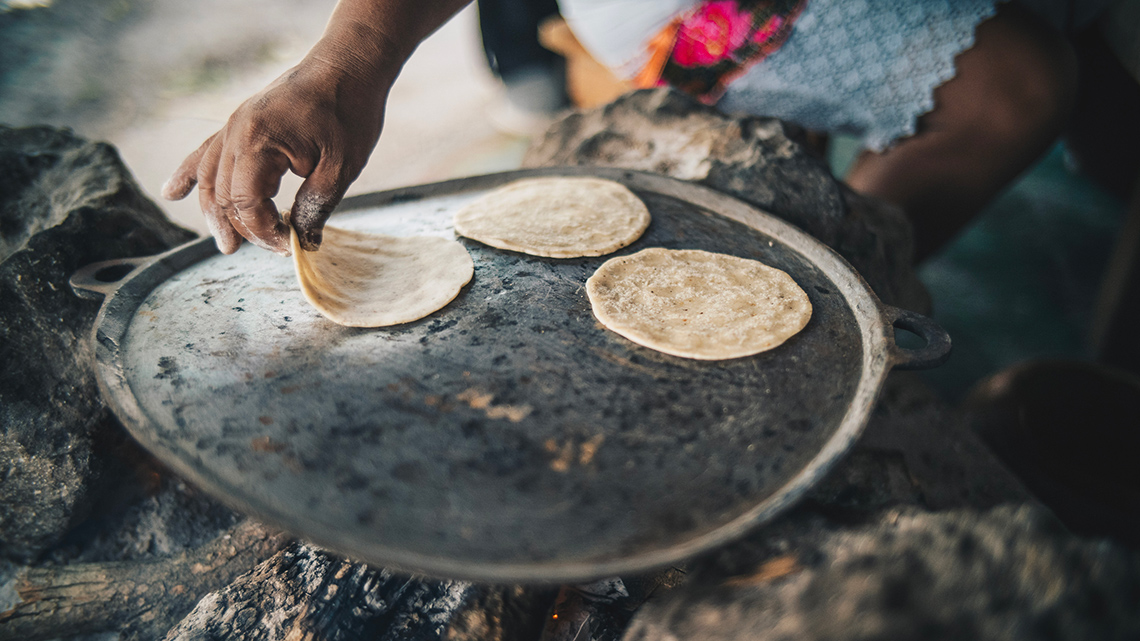
Tortilla bread can be baked over an open fire (El Cuyo, Yucatan, Mexico).
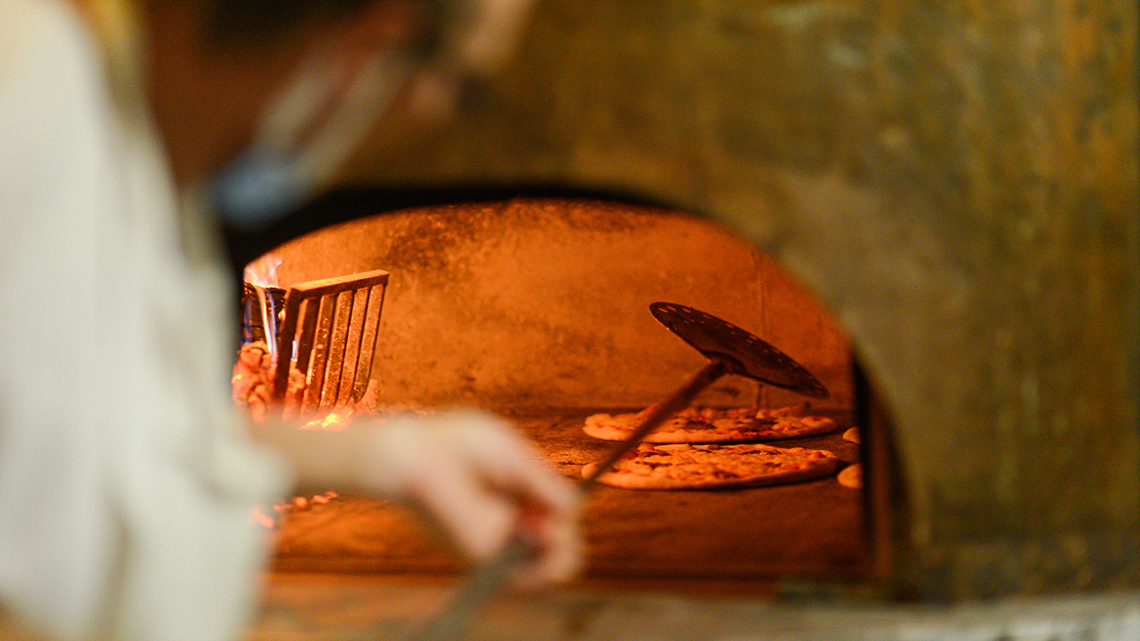
Pizza is another example of a popular flatbread food traditionally cooked in a wood-fired oven (Mignano Monte Lungo, Italy).
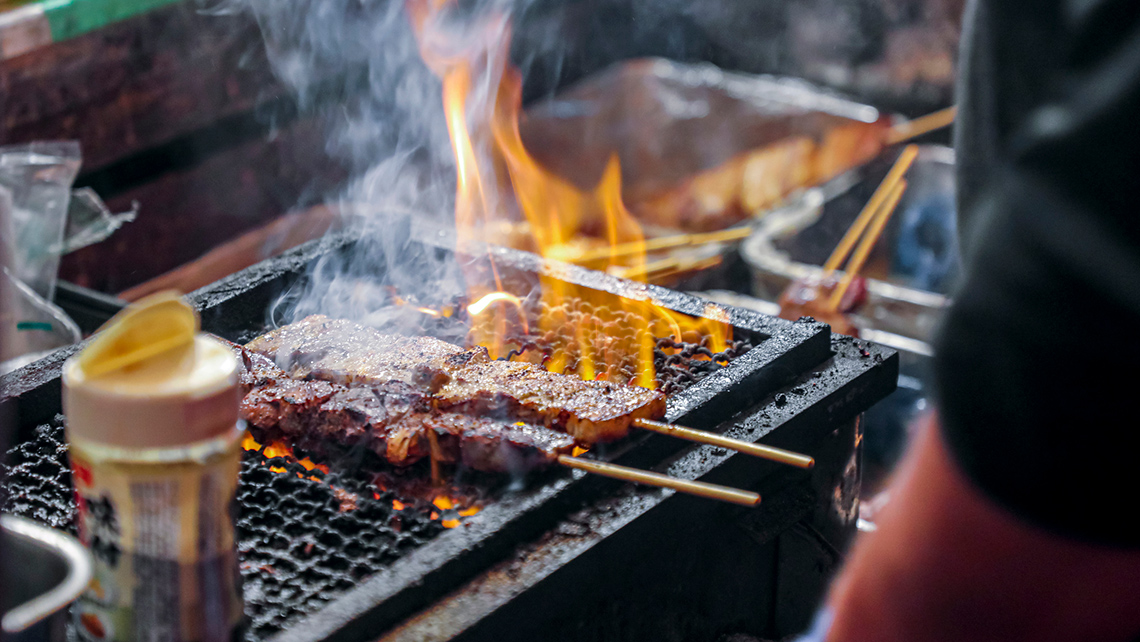
Using a grate to cook food over an open fire is the basic design of a barbecue (Yokohama, Kanagawa, Japan).
As people got better at controlling fire over time in communities and societies around the world, they began using fire in various purposeful and beneficial ways.
Explore some of these ways to use fire in the following list:
Action
Fire and sustainability
Fire is a result of converting one type of energy – potential energy – into another – heat energy.
Fire is used every day to help us live our lives on Earth. Most vehicles on the road burn fuel (like gasoline) in order to produce power for an engine to run. Many people use fire to cook food (like on the stove in the kitchen or barbecue outside). Many people also use fire to stay warm in their home when it is cold outside (like in the winter).
Because of the everyday demand for fire, it is important for humans to interact with it in responsible, sustainable, and safe ways.
Time to code!
Your task will be to alter a program that demonstrates the energy transfer that occurs in the form of fire: potential energy stored in wood that is converted to heat energy.
Did You Know?
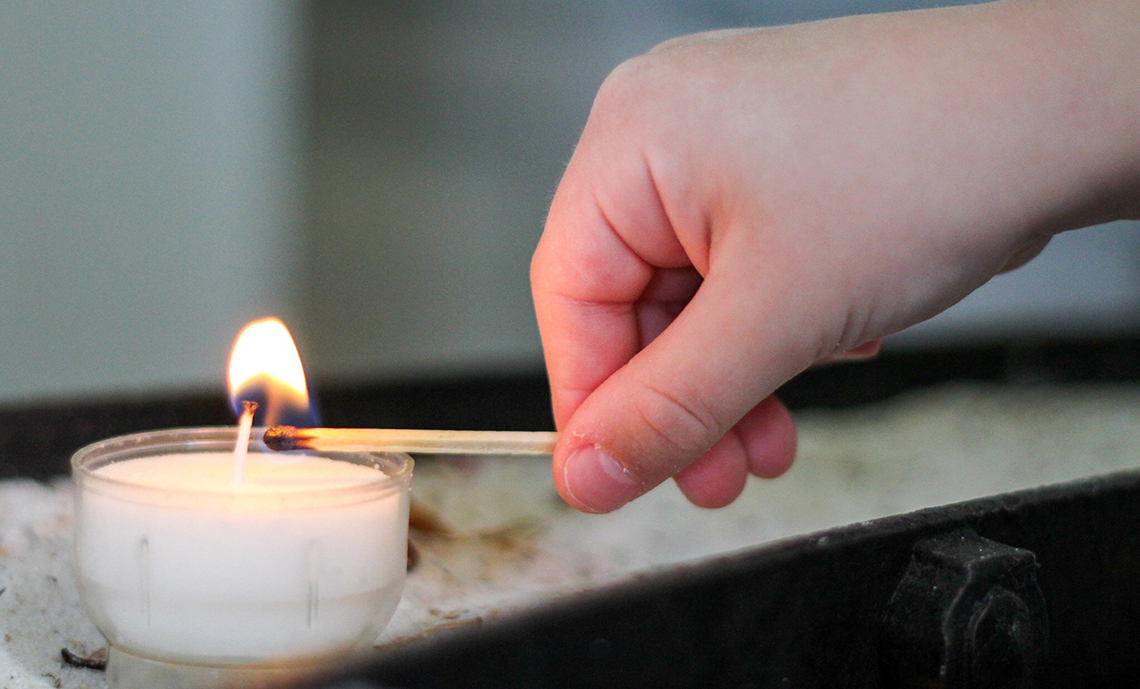
Did you know?
A match has easily ignitable compounds on its head and is lit on fire by striking it against another ignitable compound (like on its box). The flame from the match is used to make the temperature in the wood rise much faster than it would without the lit match – making it reach its ignition point much faster. This will make the wood start to burn in a much shorter amount of time. You could say that a match “helps” to start a fire when it is needed.
Representing code
Coding is a computer programming language that can be used to model concepts and design programs.
We will be using Scratch, which is a coding application that uses blocks to create code. Let’s learn more about how we might use Scratch.
Student Success
Let's think about code!
When you start your own project in Scratch, you will be making code using blocks. A block is a small piece of code that appears to be a puzzle piece or a building block. You can use blocks to build your own code. Each kind of block controls an action. There are 9 kinds of blocks available at the start! As you learn more, you may find other types of blocks to add to your code.
Each block describes an action that is performed by a character. An action is like an instruction. A character can be a sprite or a backdrop. A sprite is an image of a person or object. A backdrop is an image of a background or a place. Your code creates actions that affect a sprite or a backdrop. You can choose if you are using a sprite or a backdrop.
As you make your code, you are connecting blocks to make a code block. Your block of code is known as a code block or a script! The space where you build your code is also known as the scripts area. Press and place each of your blocks into the centre area to make your code. When you activate your code, it is known as running your code.
To start creating code, press on a block and move it to the center area. Press and snap or place your next block under your current block. Now you have created a code block!
Once you have made a code block, your code should perform an action. The action can be made by a character like a sprite or a backdrop. You can make as many characters as you like. You can make different coding instructions for each one!
You can change the order of your blocks or delete a block at any time. You can also copy or duplicate a section of your code. To copy code, right-click on the first block you want to copy. It will copy all of the blocks that follow it. Connect your copied code to the bottom of the code block you want to it added to!
Note to teachers: See your teacher guide for collaboration tools, ideas and suggestions.
To explore some possible code elements and blocks that you may come across in this learning activity, press on the following tabs:
A sprite is a character that carries out the actions that you make with your code.
The backdrops can also be changed by your code. Some blocks change what the backdrop will do!
A motion block makes a sprite move! You can move, turn or ask a sprite to move to a certain position.
A looks block changes how a sprite looks! You can choose costumes for each of your sprites.
A sound block make audio, or a sound. You can use the audio that is included in Scratch. You can also record your own sounds!
An events block is the start button for a code block. To decide when you want your code to run or start, place an events block at the beginning of your code. Your events block is how you decide when your code will start!
Your events block has to be your first block because it starts your code. You can choose how you want your code to start!
A control block is a block that controls when an action happens. A control block can change the order and timing of an action. You can use control blocks to wait, to repeat and even to loop your code!
A sensing block is a block that helps characters work with each other.
For example, what happens if you have two sprites ask each other a question?
An operators block is a block that adds math to your code.
Operators blocks can be tricky to put together.
Before you can put an operators block in your code block, you have to add another block! You could use a sensing block or a variables block. You will need to fill any blank spaces that are part of your operators block. Press and drag a sensing or variables block to snap into any blank spaces. Now you can put your operator block in your code block!
A variables block is a block that keep track of information. A variables block helps to change how to code is run each time. It can be used to create a challenge in a game!
My Blocks is a special area to keep your very own blocks! You can save your own blocks in the My Blocks category.
Now you have explored what kind of blocks you can use in Scratch!
For this activity, we will use Scratch to remix and to understand the energy transfer process.
If you are not able to access Scratch, use the images and descriptions to help you complete this activity in a method of your choice.
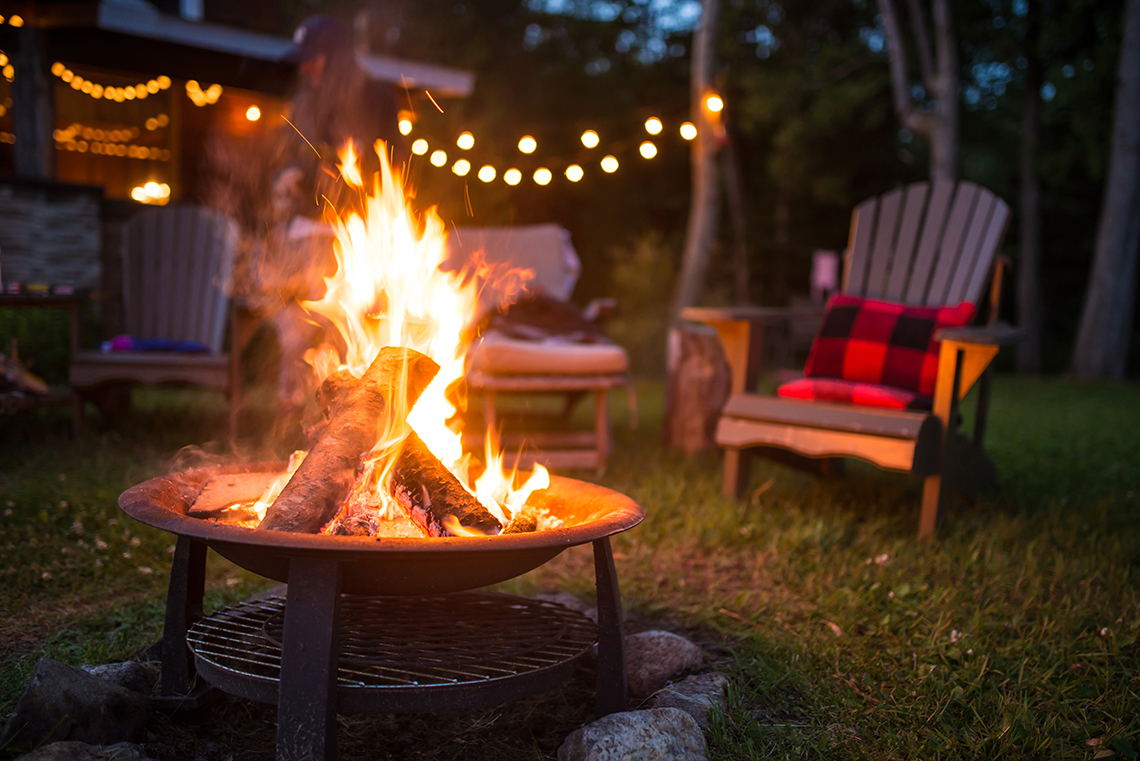
Animating the motion of how potential energy is converted to heat energy all within a firepit is a great way to model how this process works. We’ll use a “random clone” method to “animate” the motion of the flames and smoke. In this application, we will use our mouse to touch and drag a Match sprite to touch the wood in the fireplace. The fire should light, demonstrating the transfer of potential energy.
Student Tips
Student tips
The green flag at the top of the screen will execute (run) all the code that contains the when green flag clicked blocks.
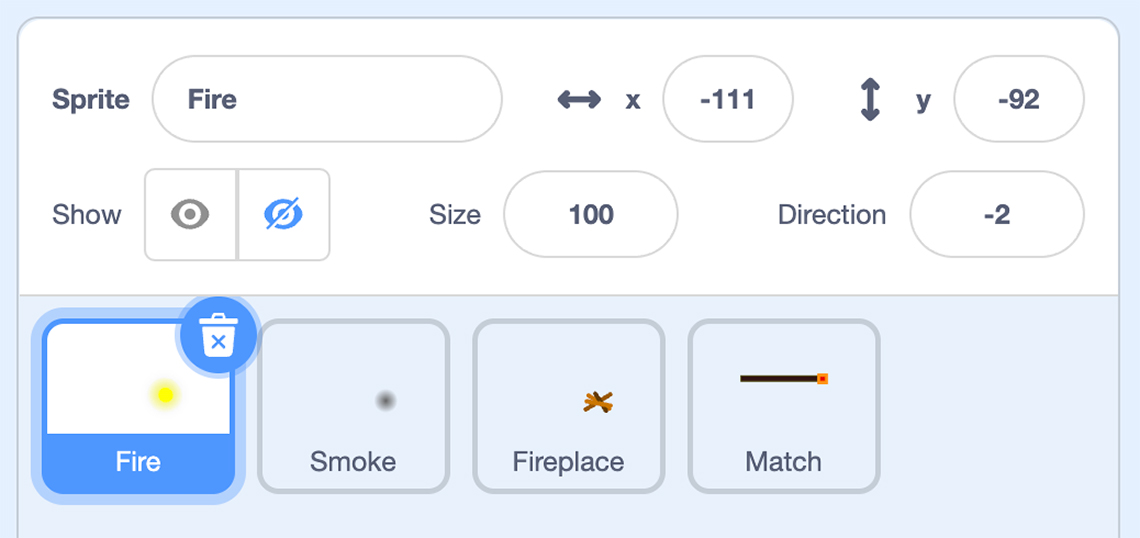
When you program a set of instructions, your sprite is the object that acts them out! We will be animating a Fire sprite, Smoke sprite, Match sprite and Fireplace sprite.
We will be using a conditional statement to check if the Match sprite is touching the Fireplace sprite – this will “ignite” the fire with a Match sprite. This will simulate how to begin the transfer of potential energy from the wood to heat energy in the air.
If you will be completing the Scratch application, you will use existing code and alter the code to learn about some of the coding blocks.
If possible, go to this link(Opens in a new window) to begin remixing a pre-existing project. We will be altering and adding code to complete a project that has already been started for us.
Remember, this application is a simulation of a match lighting a fire to demonstrate potential energy transfer.
Let’s try out the application first to experience the simulation with the existing code:
- Click on the green flag to execute the application.
- Click once on the Match and move it to the Fireplace. The fire should light when the Match touches the Fireplace. The match will also disappear as it has burned out. This is as if you are striking the wooden match to light the wood in the fireplace.
In the simulation, both fire and smoke are coming out of the fireplace. The fire and smoke are clones of the Fire and Smoke sprites.
Let’s play around with some of the code to understand how it works. To do this, we will change some of the values in the code so that it will process different numbers and therefore, the output will also change. Playing with existing code can help us to understand how code blocks work.
Part one
First, let’s adjust how the Fire sprite clones come out of the Fireplace.
To get to the code for the Fire, click on the Fire sprite to ensure it is selected.
Currently, as the clones of the Fire sprite come out of the Fireplace, they can turn anywhere between -30 and 30 degrees. Let’s change it so the Fire widens. To do this, we will replace these two values with larger numbers.
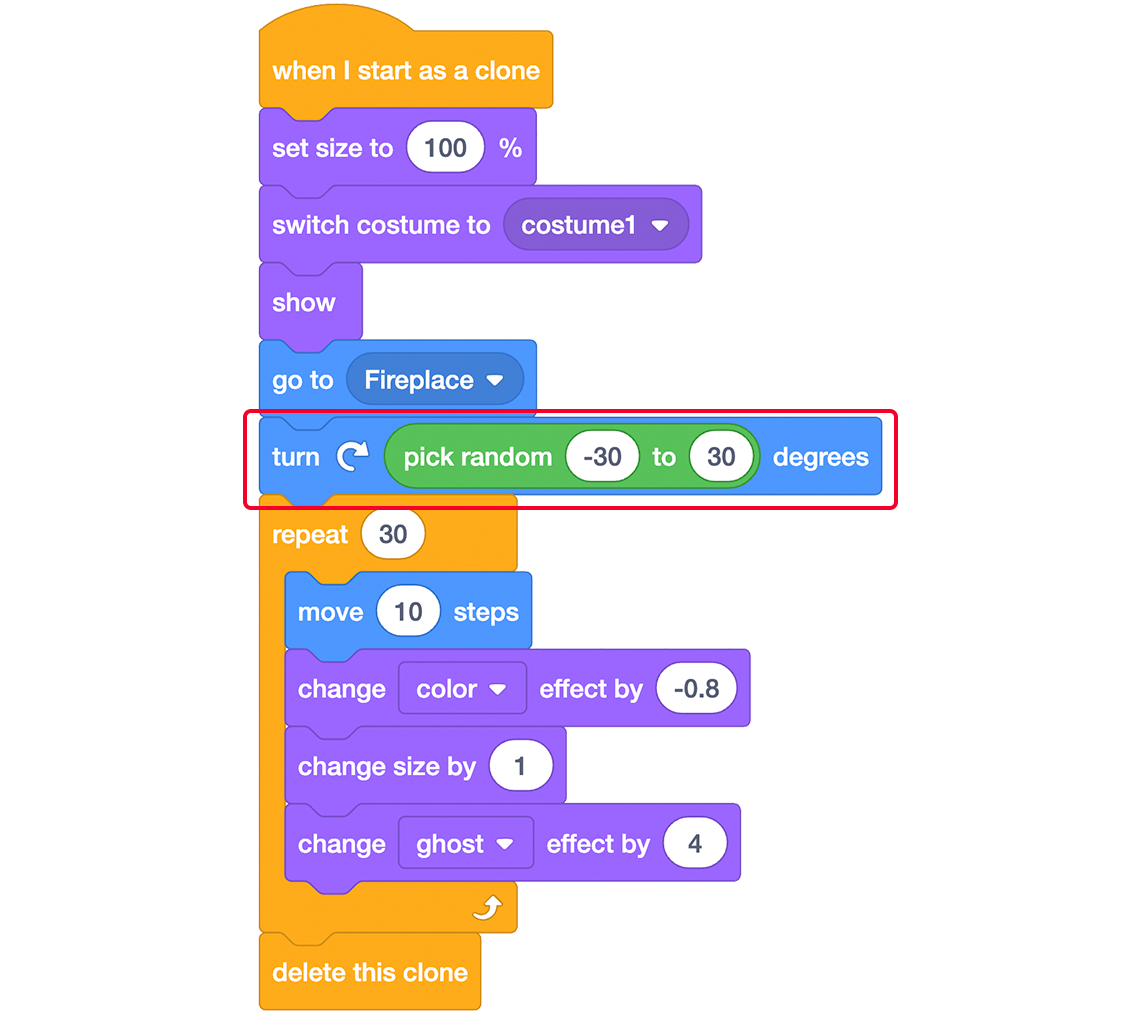
Start by changing the values that the Fire will turn as it exits the Fireplace to -90 and 90:

Run the application – How did altering the values in the turn coding block impact the output?
Try two other values to make the fire spread narrower. What values did you use? How did your changes impact the output?
Part two
While the fire is still burning, try clicking on the Smoke sprite and changing the values that the cloned Smoke sprite turns as it exits the Fireplace. You will see that the code for the Smoke sprite is very similar to the Fire sprite code:
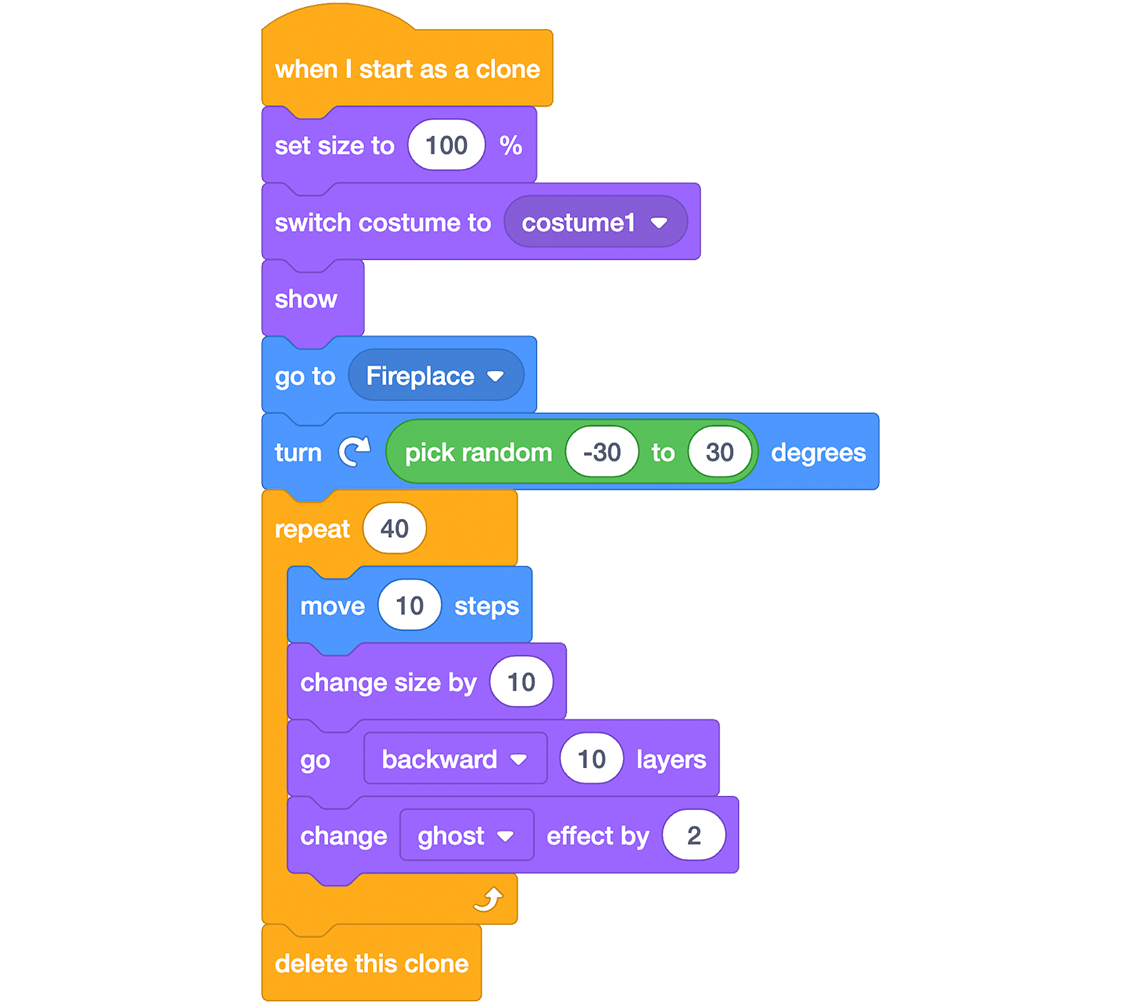
A script of code in Scratch starting with the Control block when I start as a clone block. The second block in the sequence is a Looks block set size to 100%, followed by a switch costume to costume 1 Looks block and a show Looks Block. Next is a Motion block, go to Fireplace, followed by another Motion block, turn clockwise degrees with pick random –30 to 30 operator block embedded. The next sequence of blocks starts with a repeat 40 from Control. Tucked inside the repeat block is move 10 steps block from Motion, followed by change size by 10 and go backward 10 layers, and change ghost effect by 2 all from Looks. The script ends with delete this clone from Control.
What did you change and how did it impact the output?
Part three
Let’s also change the speed at which the Fire and Smoke exit the Fireplace, as well as the distance between each clone. Let’s start with the Fire.
- Click on the Fire sprite and change the number of steps the Fire clone moves out of the Fireplace each time through the loop.
- Change it to a higher number first. Was the output what you expected? Describe what happens as a result of this change.
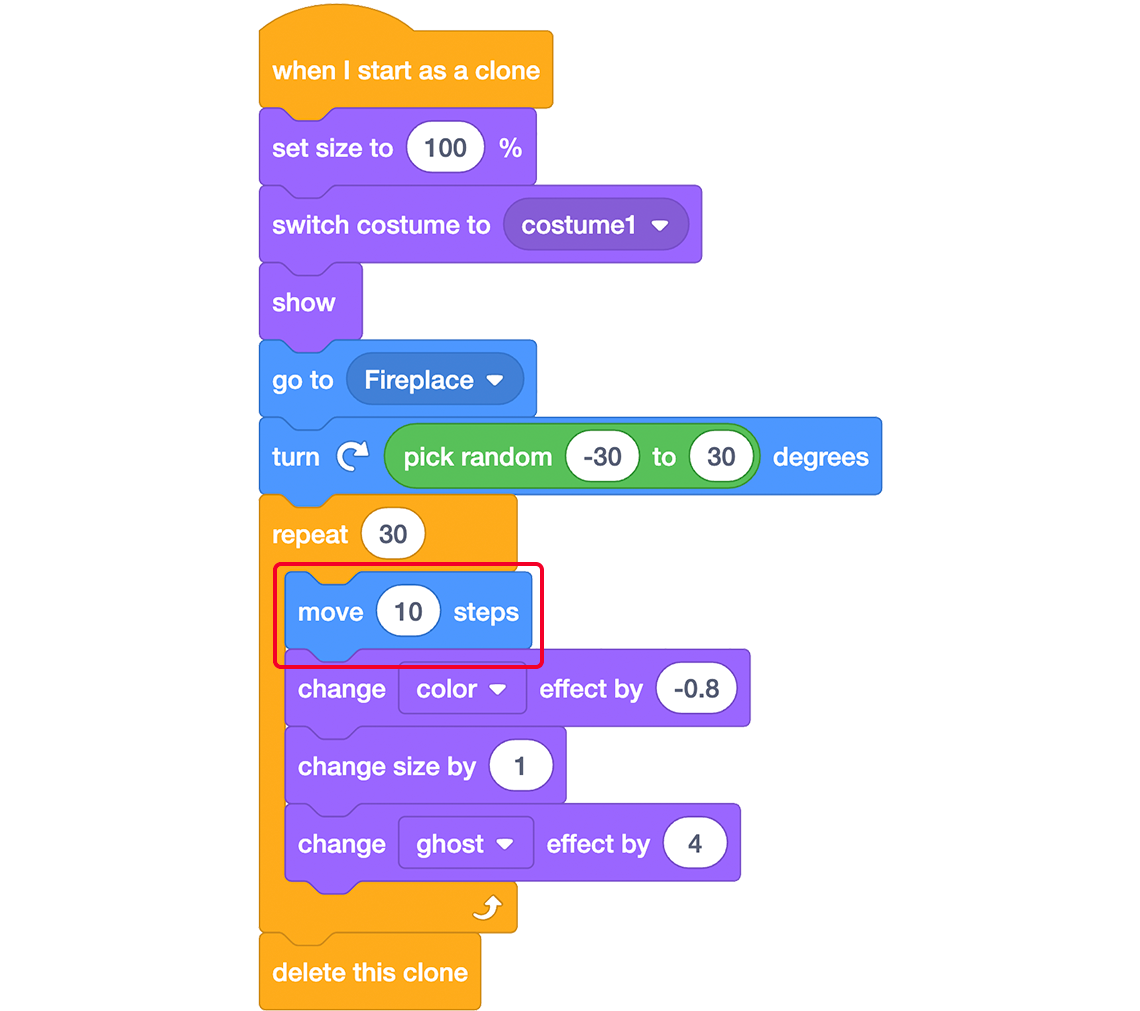
Now change it to a lower number – was the output what you expected? Why or why not?
- Apply similar changes to the Smoke sprite’s code.
Part four
Finally, experiment with the change color effect by block in the Fire sprite’s code by altering the value in the block.
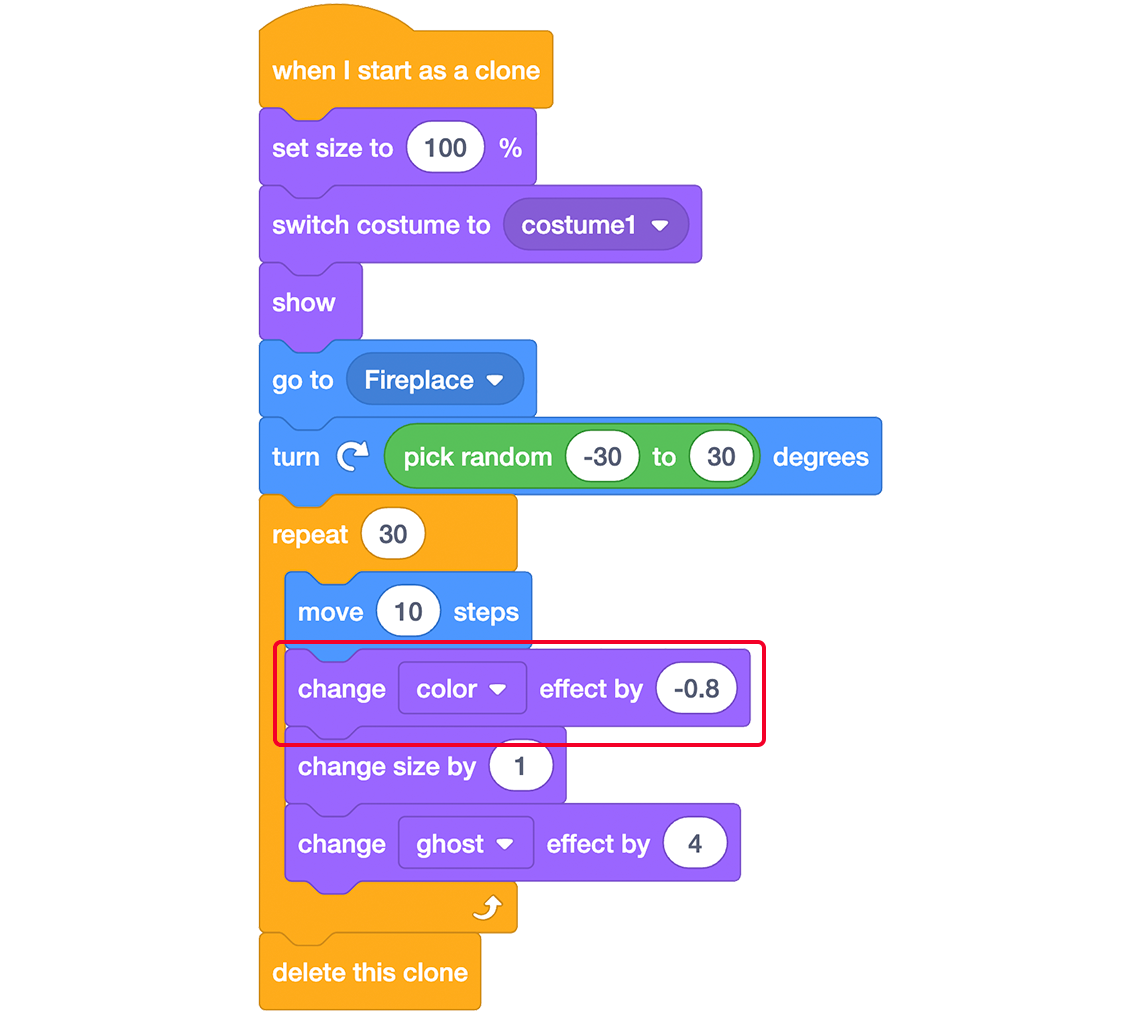
Describe what you changed and how it impacted the output.
Great job!
You’ve altered existing code to understand a bit more about the coding blocks used by the computer programmer to create this application. We can learn so much from the code written by others. Computer programmers often remix each others’ code to reuse in other applications. Sometimes, they might even make improvements in the code or use it for different purposes. It is important to always give credit to the original coder, which is done on the Project Page in Scratch.
Test it out!
As you go through the process of building your program on Scratch, review the following checklist:
Animating sprites on Scratch
Before finishing, I made sure to:
Consolidation
What do our “energy transfer” models tell us?
In our models, we showed a simulation of how energy is stored as potential energy and transformed into another form of energy.
Check your understanding by accessing the following fill-in-the-blanks activity:
Pause and Reflect
Pause and Reflect
What worked well? What skill would you like to continue developing when it comes to coding?
How has altering code helped you to describe the energy transfer process?
How might you add to or change the code next time?
Record your responses digitally, in writing, or as an audio recording.
Share your ideas with a partner, if possible.
Reflection
As you read through these descriptions, which sentence best describes how you are feeling about your understanding of this learning activity? Press the button that is beside this sentence.
I feel…
Now, record your ideas using a voice recorder, speech-to-text, or writing tool.