Minds On
Invasive species
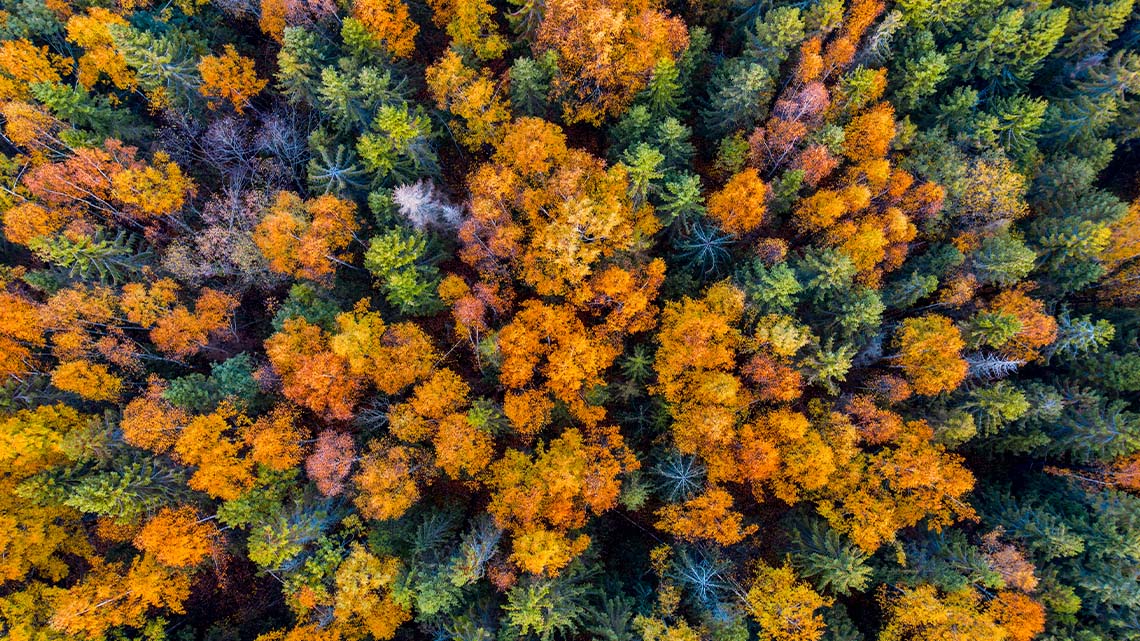
An invasive species is a living thing that is “non-native” to a given area – in other words; it is not originally from there. They almost always disturb the ecosystem where they have been introduced – either by accident or on purpose (for e.g., by humans).
These species may harm other living things in the area and also the surrounding environment. Invasive species include plants, animals, bacteria, and other kinds of living things. In many cases, invasive species can grow and spread quickly in an area.
This can affect the biodiversity of a local environment.
Press ‘Hint’ to access a definition.
Biodiversity describes the variety of life on earth, within each species of plant and animals within communities, and among physical landscapes that support them.
Did You Know?
Did you know?
The Emerald Ash borer is a green beetle that is native to north-eastern Asia that feeds on Ash trees. In its own native ecosystem, it is found in low amounts and does not cause significant tree damage. However, it is very destructive to Ash trees in North America and Europe, where it is considered invasive.
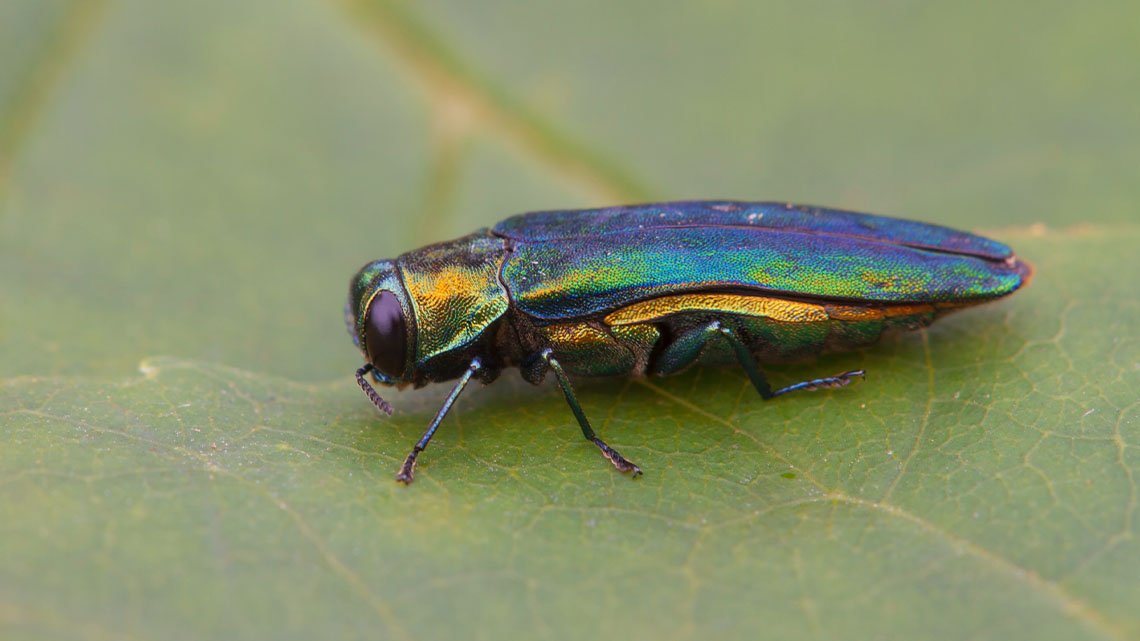
The emerald ash borer
Biodiversity
- Why is biodiversity important? What are the benefits of biodiversity?
- How might invasive species impact the health and biodiversity in a local environment?
Record your ideas in a notebook or another method of your choice.
Press ‘Let’s Check!’ to access possible responses.
- Biodiversity is important because it supports different species of plants and animals to be resilient and resistant to disease and other environmental conditions that might affect growth.
- Because all living things are connected, maintaining diversity is critical to the health of the planet.
- When an invasive species grows and spreads quickly in an area, this can decrease the number and variety of native species in it.
Action
Global connection
The United Nations (UN) is a group of many countries from around the world that have come together to create a better future for people and the environment. They have created 17 goals called the Sustainable Development Goals.
This learning activity is connected to Goal #13: Climate Action. This means everyone should help reduce climate change and its impact. Storms, disasters, and lack of food and water are made worse by climate change.
One of the impacts of climate change is increased temperatures. As temperatures rise, this helps some species to thrive, which can affect the biodiversity of a local environment. For example, the warmer temperatures in North America and Europe have allowed for faster and wider spread of the Emerald Ash borer population.
Let’s code!

Coding is a computer programming language that can be used to model concepts and design programs.
Scratch is a coding application that uses blocks to create code. Let’s learn more about how we might use Scratch.
In this learning activity, we will use code to demonstrate the impact that an invasive species can have on the biodiversity of an ecosystem.
Student Success
Let's think about code!
When you start your own project in Scratch, you will be making code using blocks. A block is a small piece of code that appears to be a puzzle piece or a building block. You can use blocks to build your own code. Each kind of block controls an action. There are 9 kinds of blocks available at the start! As you learn more, you may find other types of blocks to add to your code.
Each block describes an action that is performed by a character. An action is like an instruction. A character can be a sprite or a backdrop. A sprite is an image of a person or object. A backdrop is an image of a background or a place. Your code creates actions that affect a sprite or a backdrop. You can choose if you are using a sprite or a backdrop.
As you make your code, you are connecting blocks to make a code block. Your block of code is known as a code block or a script! The space where you build your code is also known as the scripts area. Press and place each of your blocks into the centre area to make your code. When you activate your code, it is known as running your code.
To start creating code, press on a block and move it to the center area. Press and snap or place your next block under your current block. Now you have created a code block!
Once you have made a code block, your code should perform an action. The action can be made by a character like a sprite or a backdrop. You can make as many characters as you like. You can make different coding instructions for each one!
You can change the order of your blocks or delete a block at any time. You can also copy or duplicate a section of your code. To copy code, right-click on the first block you want to copy. It will copy all of the blocks that follow it. Connect your copied code to the bottom of the code block you want to it added to!
Note to teachers: See your teacher guide for collaboration tools, ideas and suggestions.
To explore some possible code elements and blocks that you may come across in this learning activity, press on the following tabs:
A sprite is a character that carries out the actions that you make with your code.
The backdrops can also be changed by your code. Some blocks change what the backdrop will do!
A motion block makes a sprite move! You can move, turn or ask a sprite to move to a certain position.
A looks block changes how a sprite looks! You can choose costumes for each of your sprites.

A sound block make audio, or a sound. You can use the audio that is included in Scratch. You can also record your own sounds!
An events block is the start button for a code block. To decide when you want your code to run or start, place an events block at the beginning of your code. Your events block is how you decide when your code will start!
Your events block has to be your first block because it starts your code. You can choose how you want your code to start!
A control block is a block that controls when an action happens. A control block can change the order and timing of an action. You can use control blocks to wait, to repeat and even to loop your code!

A sensing block is a block that helps characters work with each other.
For example, what happens if you have two sprites ask each other a question?
An operators block is a block that adds math to your code.
Operators blocks can be tricky to put together.
Before you can put an operators block in your code block, you have to add another block! You could use a sensing block or a variables block. You will need to fill any blank spaces that are part of your operators block. Press and drag a sensing or variables block to snap into any blank spaces. Now you can put your operator block in your code block!
A variables block is a block that keep track of information. A variables block helps to change how to code is run each time. It can be used to create a challenge in a game!
My Blocks is a special area to keep your very own blocks! You can save your own blocks in the My Blocks category.
Now you have explored what kind of blocks you can use in Scratch!
Investigate
Investigate
Let’s check out and investigate an example of a game that was made using Scratch.
In this program, the invasive species is the Japanese beetle and the native species is the Blue Jay. Both species are dependent on wild raspberries for survival.
Access the following Scratch code: Scratch(Opens in a new window)
After exploring the game, respond to the following questions:
- How is the Blue Jay population impacted by the overpopulation of the Japanese beetle?
- What is the impact of an invasive species on an ecosystem?
Record your ideas in a notebook or another method of your choice.
Press ‘Let’s Check!’ to access the correct response.
The Japanese beetle is outcompeting the Blue Jay for food, which can cause Blue Jay populations to die off, decreasing the overall biodiversity of the area.
Build your own code!
After exploring an example of a biodiversity game, let’s try to create our own code.
Your task is to build a program that shows the loss of available food for a native species due to the invasion of a non-native species in their environment.

Female Ash Borer beetles lay eggs in spaces under the bark of ash trees. The larvae (babies) feed under the tree, emerging as adults within two years. This feeding is destructive to the tree, which is a nesting site for the native Ontario bird, the Evening Grosbeak.
This time, we will use the Emerald Ash borer beetle as the invasive species and an Evening Grosbeak bird as the native species.
If possible, access Scratch on your own device. You can follow the step-by-step instructions in the following sections to build the code for your own biodiversity game.
If you are unable to access Scratch, you may explore the code that was used to create the biodiversity game we played earlier. Press ‘See Inside’ to explore the code.
Access the following Scratch code for the biodiversity game: Scratch(Opens in a new window)
Student Tips
Student tips
If you are using Scratch, check out the following tips to help you get started:
- The green flag at the top of the screen will execute (run) all the code that contains the “When green flag clicked” blocks.
- We will be using the “Broadcast” (message) and “When I receive” (message) blocks to send a command from one Sprite to another – in this case, to prompt “Game over” for the player.
- We will also be setting and using a variable–“score.” This ensures the game conditions vary slightly each time to add a challenge for the player.
- Operator blocks can be tricky to put together (press and drag). We will need to insert other blocks (like “score” or Sensing blocks first into them, before placing them into the main block chain; like the following example).

A Looks block that says Show connected to a Control block that says Repeat Until and a blank space. An Operator block that says blank space or blank space is pointing to the blank space in the Control block. The two blank spaces in the Operator block refer to two Motion blocks: "touching mouse1?" for the first one and "touching Trees?" for the second one.
Your turn!
If possible, access Scratch on your own device. You can follow the step-by-step instructions to build the code for your own biodiversity game.
Access the following Scratch link to begin your code: Scratch(Opens in a new window)
Press the following tabs to access the coding steps and details.
Let’s create a code for the Grosbeak sprite.
Explore the following coding instructions:
- First, access Scratch or the Scratch link on your device.
- Press the Grosbeak sprite.

Two scripts from Scratch. The first script contains the following blocks: when Green Flag clicked, go to x: 0 y:0, (which means the Grosbeak sprite starts in the middle of the frame) switch backdrop to Play (which sets the scene to begin the game), show, wait 1 second, and two blocks in a Control block for "forever" that say go to mouse pointer and point toward Trees. This final Control block means the Grosbeak sprite always follows the computer mouse and points to the Tree sprite. The second script contains the following blocks: when I receive End, Hide. This means the sprite Hides when Game Over happens.
Create a code for the Trees sprite.
Explore the following coding instructions:
- Press on the Trees sprite.
- Press “Events” on the left, then press on “message1” to change it to our custom message–“end.”

A screenshot of the Scratch toolbar interface. On display is the “Events” tab. In this tab the code block “when I receive message1” is highlighted. Message1 is a dropdown that has been clicked, and from that dropdown “new message” is selected.
- Press “Variables” and drag the “Set my variable to O” block onto the stage. Press on “Rename variable” and change it to our custom variable — “score.”

Create more code for the Trees sprite.
Now that we have the custom message and custom variable set, we can build the rest of the code for the “Trees” sprite:

Two scripts from Scratch. The first script contains the following blocks: when Green Flag clicked, hide, set score to 0, wait 1 second, and several blocks in a Control block for "forever" that say go to x: pick random -200 to 200 y: pick random -150 to 150, show, wait until touching Grosbeak, change score by 1, hide, wait 0.5 seconds. This final Control block creates a loop of the Tree sprite's behaviour in-game - it shows up in a random location, disappears when the Grosbeak sprite touches it, adds one point to the score, and then repeats. The second script contains the following blocks: when I receive End, Hide. This means the sprite Hides when Game Over happens.
Create the code for Beetle1 and Beetle2 sprites.
We’ll build for “Beetle1” first, then duplicate that code and modify it slightly for “Beetle2.”

Two scripts from Scratch. The first script contains the following blocks: when Green Flag clicked, go to x: -203 y: 150, wait until score = 4, show, and several blocks in a Control block for "repeat until touching Grosbeak or touching trees" that say point towards Trees, if score > 14 then, move two steps, else move 1 step. This Control block creates a loop of Beetle1's behaviour in-game until specific conditions are met, such as touching the Grosbeak or Trees sprites. This also increases the speed after score > 14. The first script ends with the following blocks: wait 1 second, broadcast end, switch Backdrop to Game Over (which sends a message to all other sprites to end the game), and stop all. The second script contains the following blocks: when I receive End, Hide. This means the sprite Hides when Game Over happens.

A scratch screenshot showing the Beetle1 scripts that were just created. An instruction at the top says to click and grab the top of the code chain and drag it to the Beetle2 sprite on the right-hand side of the screen.
Check out the following image as a guide to code Beetle2. The “Beetle2” changes are as follows:

Two scripts for the Beetle2 sprite. It is identical to the Beetle1 sprite scripts except for the following changes: instead of "wait until score = 4", change it to 6; and for "if score > 14 then", change it to 16.
Consolidation
Test it out!

You may use the following checklist to guide and test your code out!
Did you…?
Learning check!
For each sentence, select the missing word from the drop-down menu.
Pause and Reflect
Pause and reflect
In our models, we try to simulate the impacts of introducing an invasive species into a local environment. Consider your code and project, while reflecting on the following questions:
- What worked well? What skill would you like to continue developing when it comes to coding?
- How has writing code helped you to describe the impact of an invasive species on other organisms in an ecosystem?
- How might you add to or change the code next time?
- Why is it important to protect biodiversity?
- How do invasive species reduce biodiversity in a local environment?
Record your ideas in a notebook or another method of your choice.
If possible, share your code with a partner.
Reflection
As you read through these descriptions, which sentence best describes how you are feeling about your understanding of this learning activity? Press the button that is beside this sentence.
I feel…
Now, record your ideas using a voice recorder, speech-to-text, or writing tool.