Minds On
Water and oil
Examine the following image of water and oil in a clear glass jar. What do you notice about the oil and water?

A clear glass jar contains two distinct layers of liquid: a layer of water tinted blue at the bottom and a layer of yellow oil on top of the water. The layers do not mix together.
Observe, think, and wonder
Why do you think these two substances don’t mix together?
Complete the “Observe, Think, and Wonder Activity” in your notebook or using the following fillable and printable document I Observe, I Infer, I Wonder to record a few ideas in each box. If you would like, you can use speech-to-text or audio recording tools to record your thoughts.
|
I observe… (record points you can observe with senses) |
|
|
I infer… (record what you think from what you’ve noticed and what you might already know) |
|
|
I wonder… (record questions you may have) |
Press the ‘Activity’ button to access I Observe, I Infer, I Wonder.
Action
Learning about density

Vocabulary
Press the following tabs to review vocabulary terms.
Density
What does it mean when we say something is dense? What is density?
Explore the following video to learn more about states of matter and density.
Density is a ratio that compares mass and volume for a substance. Particles that are closer together will have a higher density because they have a higher mass per unit of volume.
Student Success
Think!
If possible, work with a partner or group to answer the following question:
- If you put an object in the water and it floats, is it more dense or less dense than the water? How do you know?
When you are ready, press ‘Answers’ to check your ideas against the supplied answer.
If an object floats in the water, then it is less dense than the water. If an object sinks in the water, it is more dense than the water.
Note to teachers: See your teacher guide for collaboration tools, ideas and suggestions.
It’s time to experiment!
The scientific experimentation process
For this activity, you will be using some of the skills from the Scientific Experimentation Process. The skills you will be using are asking, making observations, and making conclusions. Before investigating this experiment, explore the following video to learn more about the steps of the Scientific Experimentation Process.
Safety
Before you explore the following experiment, let’s perform a safety check.
Hands-on Science
Hands-on science
For this experiment, we will be learning how to calculate the density of different objects.
Complete the Lab sheet: Observing and Calculating Density in your notebook or using the following fillable and printable document. If you would like, you can use speech-to-text or audio recording tools to record your thoughts.
Press the Activity button to access the Lab sheet: Observing and Calculating Density.
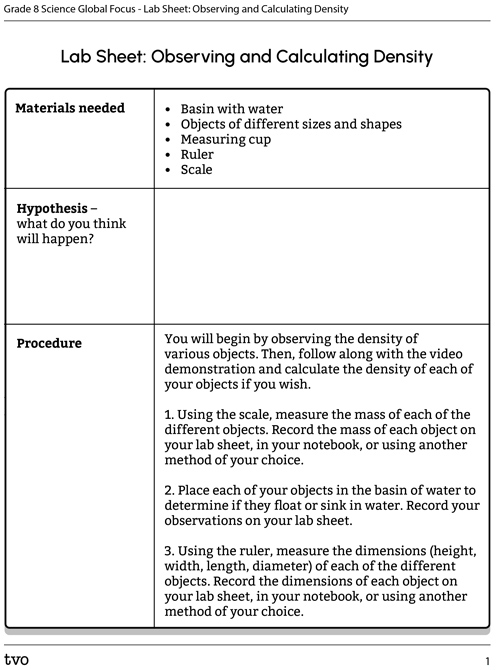
Activity (Open PDF in a new tab)Press the following tabs to access the materials and procedure for the Observing and Calculating Density experiment.
If you do not have access to materials, access the “Video demonstration” tab to explore the experiment in action. You can use the video to make your observations and draw your conclusions.
- Basin with water
- Objects of different sizes and shapes
- Measuring cup
- Ruler
- Scale
You will begin by observing the density of various objects. Then, follow along with the video demonstration and calculate the density of each of your objects if you wish.
- Using the scale, measure the mass of each of the different objects. Record the mass of each object on your lab sheet, in your notebook, or using another method of your choice.
- Place each of your objects in the basin of water to determine if they float or sink in water. Record your observations on your lab sheet.
- Using the ruler, measure the dimensions (height, width, length, diameter) of each of the different objects. Record the dimensions of each object on your lab sheet, in your notebook, or using another method of your choice.
- Calculate the volume of each of the different objects. You can also use water displacement to measure the volume of the objects, as demonstrated in the video. Record the volume of each object on your lab sheet, in your notebook, or using another method of your choice.
- Once you know the mass of each object and the volume of each object, calculate the density of each object by taking the mass and dividing it by the volume.
Check out this video to explore a demonstration of the Observing and Calculating Density experiment. Please note that materials and procedure in the video may vary slightly from what is listed in the previous tabs.
Check your understanding
Based on the learning activity and experiments, answer the following questions to check your understanding!
Select the correct answer, then press “Check Answer” to see how you did.
Compressibility
Compressibility is the measure of reducing volume (or how much the volume of matter decreases) when the substance is placed under pressure.
Explore the following image of three syringes that each filled with a different state of matter.

Three syringes filled with various substances. The plunger on each syringe has not been pushed down. The first syringe is labeled “Ice.” The second syringe is labeled “Liquid water.” The third syringe is labeled “Air.”
Student Success
Think!
If possible, work with a partner or a group to answer the following question.
- Imagine that you tried to push down on the syringe and compress each of these substances. Which do you think would compress more easily? Why?
Record your prediction in your notebook, an audio recording, or another method of your choice.
Once you have made your prediction, press ‘Answer’ to access how each substance will react when you push down on the syringe.
The syringe with the gas in it is likely to compress (or push down) the most. The syringe with the liquid in it will push down some, but not very much. Lastly, the syringe with the solid in it will not push down at all.

Three syringes filled with various substances. The first syringe is labeled “Ice.” The plunger on this syringe is at the top of the syringe. The second syringe is labeled “Liquid water.” The plunger on this syringe is slightly pushed down. The third syringe is labeled “Air.” The plunger on this syringe is almost completely pushed down.
Note to teachers: See your teacher guide for collaboration tools, ideas and suggestions.
How do particles impact compressibility?
Now that you know that gases are highly compressible, liquids are nearly incompressible, and solids are totally incompressible, let’s explore why this is. Begin by examining the following image that shows the particles for a solid, liquid, and gas.

Brainstorm
Brainstorm
How do you think that particles impact the compressibility of an object? Brainstorm your ideas using the method of your choice.
Press ‘Particles and compressibility’ to access an explanation of how particles impact the compressibility of an object.
Gases are more compressible than solids and liquids because there is so much more space between the gas molecules. The molecules are able to fill the shape and volume of the container the gas is in; however, as the gas is compressed, the particles are forced closer together and can fit into a smaller container. As the pressure on a gas increases, the volume of the gas decreases.
Liquids and solids are fairly similar. There is still some space between the molecules of a liquid, but not as much. That makes a liquid nearly incompressible. As the pressure on a liquid increases, the volume remains unchanged. The particles for a solid are packed very closely together and cannot move around. Because the particles are tightly packed together, they don’t have any space to move closer together under pressure, making solids uncompressible. This also reinforces why solids have a fixed volume and shape.
Uses for compressed gases

How does this apply in the real world? There are many different ways that compressed gas is used in the real world. For example, in a hospital, an oxygen tank is used to help patients with their breathing, or anesthesia is administered for a surgery. These are both compressed gases. Welding requires very hot flames that are produced by compressed gas mixtures. Lastly, summer barbeque grills are often fueled by compressed propane.
Pressure, volume, and temperature
When a liquid or gas is compressed or heated, the volume and pressure of that liquid or gas changes. Let’s explore these connections further!
As the temperature of liquid or gas particles increase, the volume also increases at the same rate. As a gas gets hotter, the particles move more quickly, the amount of space it takes up (or its volume) gets bigger too. Explore this further with the example of a balloon in the following video.
Check out this video entitled Chemistry: Charles’s Law (Gas Laws) to learn more about the relationship between volume and temperature.
Similar to volume and temperature, as the temperature increases, the particles move more quickly and increase the pressure inside a container. This can only happen when the volume stays the same, or when the container is fixed. Think back to the example of the balloon – as the molecules moved faster, the balloon was able to stretch bigger. However, if the container cannot be made bigger or smaller, the particles will bounce off the sides and increase the pressure. Explore this further in the video below.
Explore this video entitled Chemistry: Gay-Lussac’s Law (Gas Laws) to learn more about the relationship between pressure and temperature.
For this comparison, the temperature of the molecules must be constant (stay the same). As the volume of a substance decreases, the pressure increases. As the volume increases, the pressure does the opposite, and decreases by the same amount. Let’s explore this concept further.
Access this video entitled Chemistry: Boyle’s Law (Gas Laws) to learn more about the relationship between pressure and volume.
Check your understanding
Check your understanding of the relationships between volume, pressure, and temperature.
Select the correct answer, then press “Check Answer” to see how you did.
Did You Know?
Did you know?
Have you ever noticed a warning label that cautions a person from heating up a container under pressure, or ensuring a container under pressure is stored at room temperature? Can you predict why this warning label is there?
This warning label is there because the container contains a certain amount of gas that is at a constant volume. If the temperature of the gas molecules is increased, then the pressure will increase. If the temperature and pressure continue to rise, the pressure could increase to the point where the container could explode.

Consolidation
Drawing conclusions

Student Success
Think!
Based on the information that you have learned in this learning activity, respond to the following questions using a method of your choice. If possible, work with a partner or a group.
- Explain the difference between solids, liquids, and gases in terms of their density.
- Explain the difference between solids, liquids, and gases in terms of their compressibility.
- How is compressibility used in real-life? You may wish to include a diagram in your explanation.
- Explain the relationship between pressure, volume, and temperature of a pressurized liquid or gas.
Note to teachers: See your teacher guide for collaboration tools, ideas and suggestions.
Reflection
As you read the following descriptions, select the one that best describes your current understanding of the learning in this activity. Press the corresponding button once you have made your choice.
I feel…
Now, expand on your ideas by recording your thoughts using a voice recorder, speech-to-text, or writing tool.
When you review your notes on this learning activity later, reflect on whether you would select a different description based on your further review of the material in this learning activity.