Minds On
The force of gravity
When someone drops an object, it falls until it hits the ground or a surface. The invisible force that causes an object to fall is called gravity. Gravity is the universal force that pulls objects together.
Explore this video entitled ‘Gravity’ to learn more this invisible force.
In the video, Teacher Aldo explains that everything on the Earth’s surface is attracted to its center at the same rate, at 9.8 metres per second squared or 9.8 m/s2.
He explains that if we were to take any two objects on the surface of the Earth and release them at the same time, they would hit the Earth at the same moment. Teacher Aldo demonstrates this by dropping a ping-pong ball and a utility ball at the same time, and they reach the ground at the same time.
Do you think the results would be the same if the objects were released on another planet?
Action
Gravity in space
Big ideas
- Gravity is the force that pulls two objects together. Every object that has mass has a gravitational pull. The amount of gravity pulling objects together depends on two things: how much mass the objects have, and how far apart the objects are.
- Gravity determines the interactions between the stars, planets, and moons. The mass of the Earth and the Sun is so great that it creates enough gravity to hold us in orbit. Gravity is also the force that holds us to the Earth’s surface.
- Gravity is measured in units of m/s2, or meters per second squared.
- The gravitational pull is different on different planets. A planet’s size and mass determine how strong its gravitational pull is.
Let’s explore how gravity is experienced on different planets and moons in the solar system.
NASA planetary fact data
NASA stands for National Aeronautics and Space Administration. NASA was established on October 1, 1958, as part of the United States government, and is actively involved in space exploration and research. NASA uses advanced technology to access and collect data that supports understanding about space.
Examine the following NASA planetary fact data about the measurement of gravity on each of the following planets and celestial bodies.
NASA Planetary Fact Data
|
Planets/Celestial Bodies |
Gravitational Pull |
|---|---|
|
Mercury |
3.7 m/s2 |
|
Venus |
8.9 m/s2 |
|
Earth |
9.8 m/s2 |
|
Moon (celestial body) |
1.6 m/s2 |
|
Mars |
3.7 m/s2 |
|
Jupiter |
23.1 m/s2 |
|
Saturn |
9.0 m/s2 |
|
Uranus |
8.7 m/s2 |
|
Neptune |
11.0 m/s2 |
|
Pluto (celestial body) |
0.7 m/s2 |
Answer the following questions about the data.
Select the correct answer, then press “Check Answer” to see how you did.
Think about it!
Why does the gravitational pull vary from planet to planet?
Press ‘Answer’ to access why the gravitational pull varies from planet to planet.
The amount of gravity pulling objects together depends on two things: how much mass the objects have, and how far apart the objects are. A planet’s size and mass determine how strong its gravitational pull is.
Representing data
In this video, the different planets and the sun are represented at the bottom of the screen. Several balls are dropped at the same time from the same height. The balls fall at different rates and reach the surface at different times depending on the gravitational pull of that planet or sun.
Explore this video entitled “Visualizing the Gravitational Pull of the Planets” to learn more about the gravitational pull on the different planets.
Coding gravity
Inputting data
Coding is a language that uses data to create step-by-step instructions. Coding can be used to program computers, and the data can be inputted in different ways, including directions on a flow chart, moving on a grid, building a block chain, or using verbal instructions.
Let’s explore coding with Scratch!
Coding is a computer programming language that can be used to model concepts and design programs.
Scratch is a coding application that uses blocks to create code. Let’s learn more about how we might use Scratch.
Student Success
Let’s think about code!
When you start your own project in Scratch, you will be making code using blocks. A block is a small piece of code that appears to be a puzzle piece or a building block. You can use blocks to build your own code. Each kind of block controls an action. There are 9 kinds of blocks available at the start! As you learn more, you may find other types of blocks to add to your code.
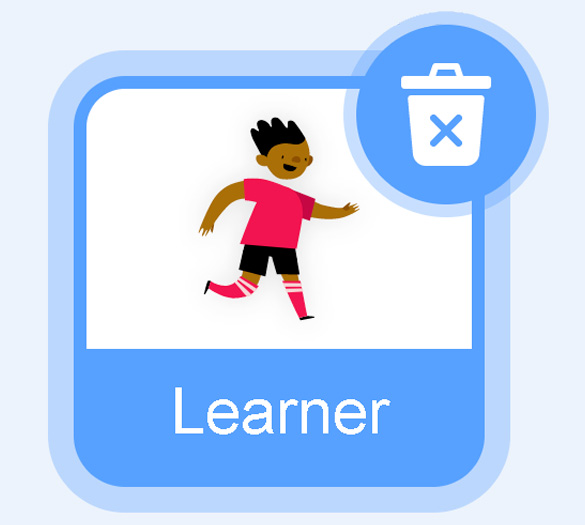
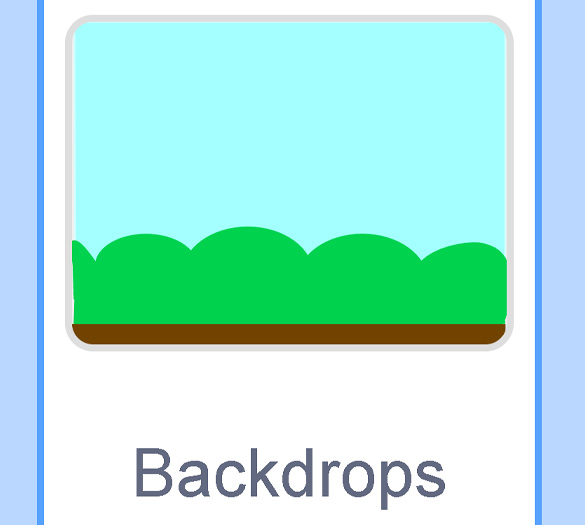
Each block describes an action that is performed by a character. An action is like an instruction. A character can be a sprite or a backdrop. A sprite is an image of a person or object. A backdrop is an image of a background or a place. Your code creates actions that affect a sprite or a backdrop. You can choose if you are using a sprite or a backdrop.
As you make your code, you are connecting blocks to make a code block. Your block of code is known as a code block or a script! The space where you build your code is also known as the scripts area. Press and place each of your blocks into the centre area to make your code. When you activate your code, it is known as running your code.
To start creating code, press on a block and move it to the center area. Press and snap or place your next block under your current block. Now you have created a code block!
Once you have made a code block, your code should perform an action. The action can be made by a character like a sprite or a backdrop. You can make as many characters as you like. You can make different coding instructions for each one!
You can change the order of your blocks or delete a block at any time. You can also copy or duplicate a section of your code. To copy code, right-click on the first block you want to copy. It will copy all of the blocks that follow it. Connect your copied code to the bottom of the code block you want to it added to!
To explore some possible code elements and blocks that you may come across in this learning activity, press on the following tabs:
A sprite is a character that carries out the actions that you make with your code.
The backdrops can also be changed by your code. Some blocks change what the backdrop will do!
A motion block makes a sprite move! You can move, turn or ask a sprite to move to a certain position.
A looks block changes how a sprite looks! You can choose costumes for each of your sprites.

A sound block make audio, or a sound. You can use the audio that is included in Scratch. You can also record your own sounds!
An events block is the start button for a code block. To decide when you want your code to run or start, place an events block at the beginning of your code. Your events block is how you decide when your code will start!
Your events block has to be your first block because it starts your code. You can choose how you want your code to start!
A control block is a block that controls when an action happens. A control block can change the order and timing of an action. You can use control blocks to wait, to repeat and even to loop your code!
A sensing block is a block that helps characters work with each other.
For example, what happens if you have two sprites ask each other a question?
An operators block is a block that adds math to your code.
Operators blocks can be tricky to put together.
Before you can put an operators block in your code block, you have to add another block! You could use a sensing block or a variables block. You will need to fill any blank spaces that are part of your operators block. Press and drag a sensing or variables block to snap into any blank spaces. Now you can put your operator block in your code block!

A variables block is a block that keep track of information. A variables block helps to change how to code is run each time. It can be used to create a challenge in a game!
My Blocks is a special area to keep your very own blocks! You can save your own blocks in the My Blocks category.
Now you have explored what kind of blocks you can use in Scratch!
Scratch code
Using Scratch, input the NASA data, and explore how different gravitational pulls affect how an object falls to the surface.
If possible, access Scratch at the following link: Scratch(Opens in a new window)
You can view and modify the code using the link. You can also follow the instructions to code the program on your own Scratch account.
Try the following steps to explore different gravitational pulls.
Step #1:
In order to experience the different effects of gravitational pull, create an object or a sprite that will fall to the ground. You might choose to use a ball, or another figure available.
Code instructions:
Find the CAT + icon in the bottom right of the screen.
Choose a Sprite that will fall to the ground.

Step #2:
The force of gravity is what pulls objects together. Follow the instructions to create a code that will pull the object or Sprite you have created to the ground.
The coding program in SCRATCH uses the y-axis and x-axis to describe direction of movement. The x-axis refers to the horizontal direction and the y-axis refers to the vertical direction.
The force of gravity pulls down along the y-axis, and we will be using these blocks to code gravity. Velocity refers to how fast gravity is pulling on an object.

A Scratch code block sequence that reads as follows: when green flag is clicked, forever repeat the following loop: change y by Y velocity, then change Y Velocity by -3. End loop.
Code instructions:
- Next to the “Backdrop” tab is a tab labeled “Code”.
- This will bring you to the stage where you will create code.
- Events: When Green Flag Clicked
- This is the block that will “start” your code. There is a green flag at the top of the screen that can be pressed to run the program.
- Variables: Make a Variable for the object or Sprite.
- New Variable Name: Name this variable “Y Velocity”
- Press Ok
- Now this variable will be an option you can choose.
- Control: Press and drag the “forever” block into the
coding area
- The “forever” block will create a simple loop for the code. Motion: Change Y by 10
- Replace the number 10 with Y Velocity
- Variables: Choose Y Velocity and drag it into the “change y by” block. It will replace the number 10.
- Place this block inside the “forever” block.
- Now, we need to create gravity. First, we will change the velocity so that the object or
Sprite falls to the ground.
- Variables: Choose “change my variable by 1”.
- When you press on “variable” there is a drop-down menu with options. Choose the option you created called “Y Velocity”
- Change the number 1 to –3. A negative number that is less than zero will cause the object or Sprite to fall.
- Place this block inside the “forever” block, underneath the previous block.
- Drag your object or Sprite to the top of the screen and press on the GREEN FLAG to make
the program run.
- The object or Sprite will continue to fall because there is no ground or surface to stop it.
Step #3:
The force of gravity is very strong and will continue to pull on an object until that object is stopped by a surface or by the ground. Follow the instructions to create a backdrop that includes a ground.

This is an image showing icons that are used to create a scratch code. Icons are for background, paint, square, bucket icon for which you will choose a colour and a code tab next to ‘Backdrops’.
Code instructions:
- Find the Backdrop icon at the bottom right of the screen.
- “Backdrops” will be a new tab at the top of the stage, where you can access different backdrops that you create.
- Choose the Paint option.
- This will create a blank stage on the left to use.
- Choose the Square icon at the bottom.
- Choose how high you want the surface of the ground to be.
- Press your mouse on the left and drag your mouse across the canvas to the other side and down to the bottom of the canvas.
- This will stretch out the square and create a large rectangle, which will become the ground.
- Choose the Bucket icon. This will “fill” the rectangle with any colour
that you choose.
- Press the “Fill” option to choose from the different colours. This will fill the ground with one solid colour.
- Press the tab next to “Code”. This will bring you back to the stage where you will program the object or Sprite.
Step #4:
Create the code to stop the object or Sprite from falling when it reaches the ground.
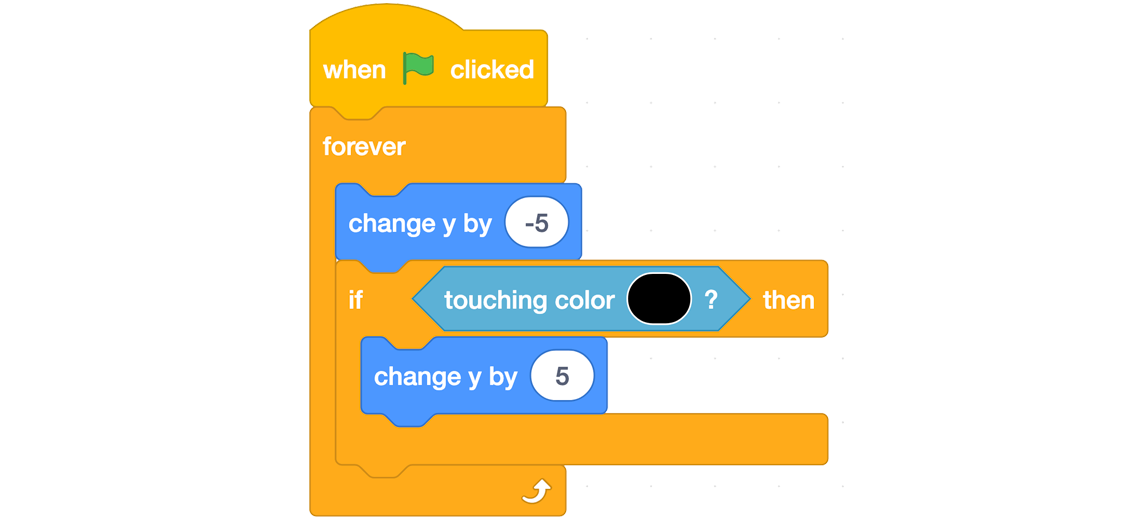
A Scratch code block sequence that reads as follows: when green flag is clicked, forever repeat the following loop: change y by -5. If sprite is touching black colour then change y by 5.
Code instructions:
- Events: When Green flag Clicked
- This is the block that will “start” your code. There is a green flag at the top of the screen that can be pressed to run the program.
- To test gravity, drag the object or sprite to the top of the screen and press the green flag to start.
- Control Forever
- This block will create a loop that repeats.
- There are many blocks that can fit inside of this “forever” block. It will stretch around all blocks inside it.
- Motion: Change y by -5
- In order for the object or Sprite to fall, the number must be less than zero.
- Control: If/Then
- This block will create a cause-and-effect response. In this case, we want the object or Sprite to stop moving when it senses or touches the surface of the ground.
- Place this block inside the “forever” block and underneath the “change y by -5”.
- Sensing: Touching colour of ground
- This block will be placed inside the If/then block.
- It is important to match the colour of your ground with this block.
- You can do this by pressing on the circle inside the block. It will reveal different colour options. At the bottom is an eyedropper icon.
- Press on the eyedropper and hover over your ground colour and press. The eyedropper will fill the circle with the colour of your ground.
- Motion: Change y by 5
- This block will stop the downward motion and the object or Sprite will rest on the ground.
- Place this block under the If/then block and inside the “forever” block.
- It is important to use the same number as above. The first number will be (negative) less than zero and the second number will be (positive) more than zero.
Step #5:
Now that code has been created to start and stop the falling of an object or Sprite, we can examine what happens when we change or modify the acceleration rate of gravity.
You can use the code provided at this link: Scratch(Opens in a new window)
Press the GREEN FLAG to run the program.
Modify the Y velocity by inputting the data for different planets using the NASA Planetary Fact sheet.
In this example, the Y velocity is set to 9.8 m/s2 to simulate the gravitational pull of Earth.

Press See inside to access the code and to modify the Y velocity.
Press the Green flag to run the program.
Record your observations each time digitally, in writing or using an audio recording.

A Scratch code block sequence that reads as follows: when green flag is clicked, sprite goes to x: -13, y: 137, forever repeat the following loop: change y by Y velocity, then change Y velocity by -3. If sprite is touching black colour then set Y velocity to 0, else change Y velocity by -3. End conditional statement. Set Y velocity to Y velocity mod -9.8. End loop.
How do the changes of the gravitational pull affect the falling of the object or Sprite?
Press ‘Possible Answer’ to access a possible answer that you might have thought of.
The object or the Sprite reaches the ground at a slower rate when the gravitational pull is lower. The higher the gravitational pull, the faster the object or Sprite reaches the ground.
In order to compare different gravitational pulls at the same time, you must create additional objects or Sprites. Copy the code by dragging it and dropping it onto the new object or Sprite. You will need to change the X axis and Y axis, so the object or Sprite is dropped from another location. Modify the Y velocity using the NASA Planetary Data. Press the GREEN FLAG to run the program.
Consolidation
Connect and reflect
Explore the following questions to demonstrate understanding of the concepts explored in this Learning Activity.
Think about it!
- Reflect on your project. What worked well? What skill would you like to continue developing when it comes to coding?
- How has writing code helped you to describe the impact of gravity on falling objects in space?
- How might you add to or change the code next time?
Reflection
As you read through these descriptions, which sentence best describes how you are feeling about your understanding of this learning activity? Press the button that is beside this sentence.
I feel…
Now, record your ideas using a voice recorder, speech-to-text, or writing tool.