Minds On
Technology and Farming

A farm using smart technology: drones, solar panels, GPS, and laptop/tablets. Drones can be used to check crops as they grow. Solar panels can be used on buildings to create power. GPS can be used to help locate and even drive farm equipment. Laptops and tablets are used to collect information about the farm.
Consider what you know about farming and respond to the following questions.
Over time, the global population has grown significantly. How might this impact the ways in which farmers manage their crops?
What might a farmer do if they do not have access to large areas to grow their crops?
How do you think farmers might use technology developing crops?
Record your responses using a method of your choice.
Action
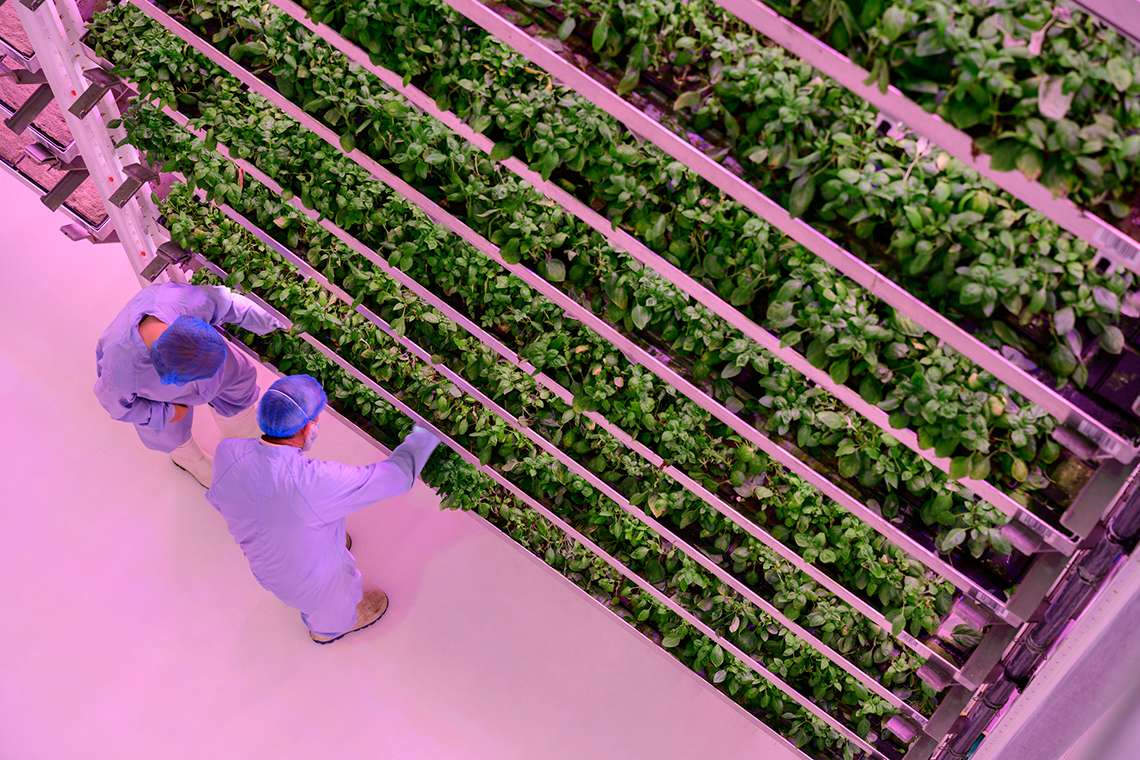
Vertical farming
This learning activity highlights people, places, or innovations that relate directly to the province of Ontario. Enjoy the exploration!

In this learning activity, we will also explore how emerging technology (new technology or existing technology that continues to be developed) such as automation and IoT (Internet of Things) can be leveraged (used to make significant changes) to make systems more efficient.
Growing vertical farming
In this video, a farmer in Sudbury, Ontario uses vertical farming technology to grow kale.
Record your thinking in a Before, During, After Chart in your notebook or using the following fillable and printable document. If you would like, you can use speech-to-text or audio recording tools to record your thoughts.
|
Before What are some positive and negative impacts of vertical farming? Explain your ideas. (Blank) (Blank) |
|---|
|
During What are two facts that you learned about vertical farming while exploring the video? (Blank) (Blank) |
|
After List one question you still have about vertical farming. (Blank) (Blank) |
Press the ‘Activity’ button to access Before, During, After Chart.
Explore the video entitled "Growing Vertical Farming" to learn more about vertical farming.
Press ‘Hydroponics’ to access a description of hydroponic farms.
Hydroponics: Hydroponics is a way to grow plants which uses water that has nutrients instead of soil.
Vertical farming is one method researchers and farmers are using to improve efficiency and reduce environmental impacts of agricultural systems.
In the video, Stephan shows Jeyan how he can control everything on his vertical hydroponic farm from his smartphone. This is because his farm has several sensors that detect things like temperature, humidity, carbon dioxide, and soil moisture level.
These sensors produce data that Stephan can access live on his phone– that is, he always knows the current conditions on his farm and can make decisions based on this live data.
Match the sensors to a potential application. Keep trying until everything is matched correctly.
Check out the following video to learn more about how Stephan’s farm grew after three years.
Special technology
The type of information and technology that Stephan uses in the farm system is made possible by automation and IoT. The IoT is made up of devices with built-in sensors that are connected to the internet.
Stephan can then use a phone, or another device that is connected to the internet, to explore the data from the sensors or to control devices in the vertical farm. In farming, IoT can be combined with automation to turn sprinklers on or off, analyze growth and quality of crops, determine when to harvest crops, and help to plan irrigation.
Automation and IoT have the potential to impact farming in many different ways.
What are some of the positive and negative impacts of automating systems in farming and food production?
Record your ideas in a method of your choice. Share your ideas with a partner, if possible.
Press ‘Impacts’ to access some possible answers of positive and negative impacts of automating systems in farming.
Automation and IoT can play a large role in helping all types of farms to be more efficient. By being more efficient, farmers can not only save money, increase their profit (the money they make) by increasing their crop production, but also reduce the negative impacts farming can have on the environment.
On the other hand, Automation and IoT can impact people in negative ways. Relying more on technology and the internet can create a loss of jobs.
Additionally, relying on technology can reduce knowledge provided by farmers and make it harder to problem solve when challenges happen.
Software applications–automation and IoT

IoT and automation systems require software applications to control what information they can collect and what they can do with that information. These software applications are written in programming code by computer programmers.
Software applications typically require the following to work:
Data or information that enters the program. This is often collected from a sensor.
This involves doing something with the data, like performing a calculation or making a decision based on the data.
For example, two numbers might be added together in a program, or the mean of a series of numbers might be calculated. Figuring out if a value is less than or greater than a limit is also an example of processing.
Data or an action that is produced by a program. This might be in the form of information displayed on a screen, a motor turning on or off, or a sound signal.
Sample application
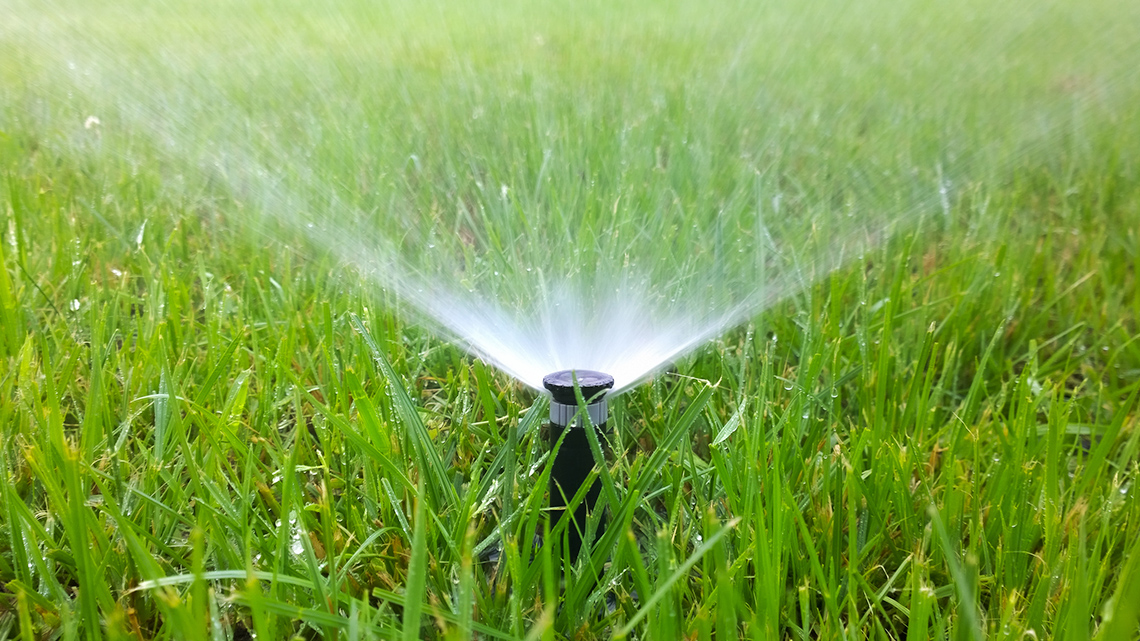
Examine the following example of an application that has been created using coding in Scratch. This application will model an automated watering system. A “sprinkler” will turn on when the moisture level in the soil gets below a certain value.
Computer scientists sometimes plan out their applications using flowcharts.
Different shapes for input, processing and output are used to organize information and actions in flowcharts. For example, input is a parallelogram, processing is a rhombus, output is a parallelogram.
|
Shapes used in a flowchart |
||
|---|---|---|
|
Input |
Processing |
Output |

Parallelogram |

Rhombus |
Parallelogram |
Here is some information about the sample application you will explore, as well as a flowchart used to plan the application:
|
Sensor used to collect data |
Moisture sensor |
|
Input (data that is collected) |
Soil moisture level |
|
Processing of data |
Check if soil moisture level is less than 65 |
|
Output |
Turn sprinkler on or off |
|
How this technology can help |
The farmer will conserve water by only using the amount of water required and will not damage crops by over-watering. |

A flowchart with the following commands: start, obtain moistureLevel, which leads to the statement "if moistureLevel less than 65." From there, the flowchart branches off to two options: if the statement is true, turn sprinkler on. If the statement is false, turn sprinkler off. Both options lead back to "obtain moistureLevel" to create a loop.
Student Success
Let's think about code!
When you start your own project in Scratch, you will be making code using blocks. A blocks is a small piece of code that appears to be a puzzle piece or a building block. You can use blocks to build your own code. Each kind of block controls an action. There are 9 kinds of blocks available at the start! As you learn more, you may find other types of blocks to add to your code.
Each block describes an action that is performed by a character. An action is like an instruction. A character can be a sprite or a backdrop. A sprite is an image of a person or object. A backdrop is an image of a background or a place. Your code creates actions that affect a sprite or a backdrop. You can choose if you are using a sprite or a backdrop.
As you make your code, you are connecting blocks to make a code block. Your block of code is known as a code block or a script! The space where you build your code is also known as the scripts area. Press and place each of your blocks into the centre area to make your code. When you activate your code, it is known as running your code.
To start creating code, press on a block and move it to the center area. Press and snap or place your next block under your current block. Now you have created a code block!
Once you have made a code block, your code should perform an action. The action can be made by a character like a sprite or a backdrop. You can make as many characters as you like. You can make different coding instructions for each one!
You can change the order of your blocks or delete a block at any time. You can also copy or duplicate a section of your code. To copy code, right-click on the first block you want to copy. It will copy all of the blocks that follow it. Connect your copied code to the bottom of the code block you want to it added to!
To explore some possible code elements and blocks that you may come across in this learning activity, press on the following tabs:
A sprite is a character that carries out the actions that you make with your code.

Sprite
The backdrops can also be changed by your code. Some blocks change what the backdrop will do!

Backdrops
A motion block makes a sprite move! You can move, turn or ask a sprite to move to a certain position.

Motion
A looks block changes how a sprite looks! You can choose costumes for each of your sprites.

Looks
A sound block make audio, or a sound. You can use the audio that is included in Scratch. You can also record your own sounds!

Sound
An events block is the start button for a code block. To decide when you want your code to run or start, place an events block at the beginning of your code. Your events block is how you decide when your code will start!
Your events block has to be your first block because it starts your code. You can choose how you want your code to start!

Events
A control block is a block that controls when an action happens. A control block can change the order and timing of an action. You can use control blocks to wait, to repeat and even to loop your code!

Control
A sensing block is a block that helps characters work with each
other.
For example, what happens if you have two sprites ask each other a
question?

Sensing
An operators block is a block that adds math to your code.
Operators blocks can be tricky to put together.
Before you can put an operators block in your code block, you have to add another block! You could use a sensing block or a variables block. You will need to fill any blank spaces that are part of your operators block. Press and drag a sensing or variables block to snap into any blank spaces. Now you can put your operator block in your code block!

Operators
A variables block is a block that keep track of information. A variables block helps to change how to code is run each time. It can be used to create a challenge in a game!

Variables
My Blocks is a special area to keep your very own blocks! You can save your own blocks in the My Blocks category.

My Blocks
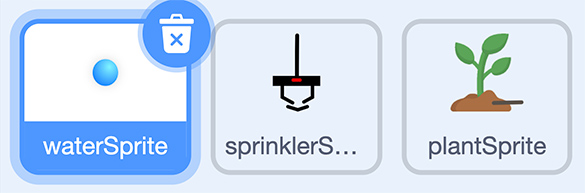
Here is some information that will help you to understand the code used in this application. Access the following Scratch code: Scratch(Opens in a new window)
- Ensure the Water Sprite is selected to access the main code
- Press on the green flag to execute the code (start the application.)
 Description
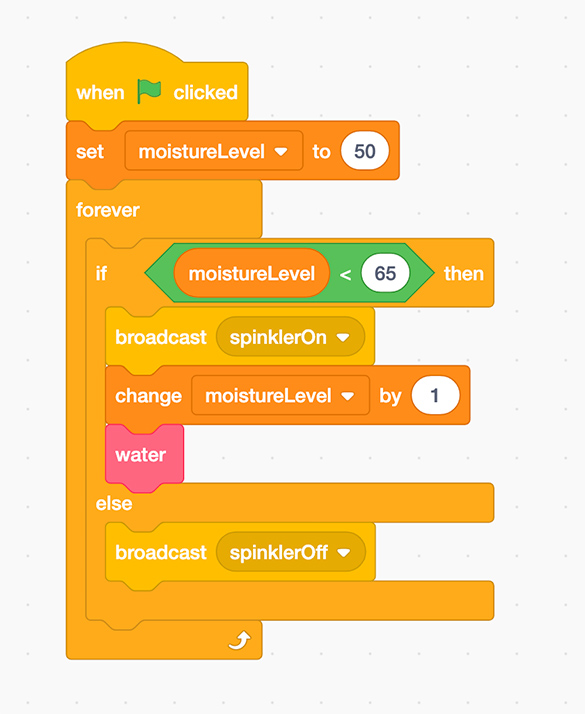
A scratch code block sequence that reads as follows: when green flag is clicked, set moisture level to 50. Next, a Control block for "forever" with the following sequence: if moistureLevel is less than 65 then, broadcast sprinklerOn, change moisture Level by 1, then water. The Control block ends with: else, broadcast sprinklerOff.
- In our code, you will notice that the sprinkler will turn on when the moisture level of the soil is less than 65.
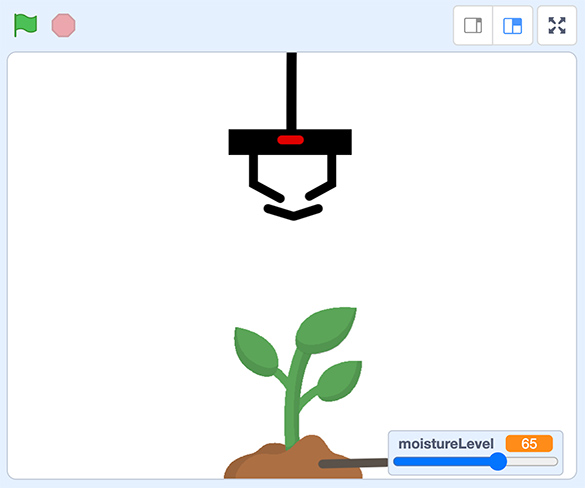
A Scratch screenshot of a sprinkler sprite over a Plant sprite. A moisture level bar to indicates the moisture of the plant is 65.
- The moisture sensor is in the soil – for this Scratch application, you will simulate the change in the moisture level of the soil by moving the slider to different levels. In an automated system, the sensor would detect the changes in the moisture level of the soil.
- When the moisture sensor level reaches a value less than 65, the sprinkler will turn on.
Try It
Try it
What do you think will happen when you slide the moisture level left and right?
Record your thinking in a method of your choice.
Next, if possible, try it out!
What happened? Was it what you expected or not? Why do you think this happened?
Record your thinking in a method of your choice.
Remember to press the green flag to test out the program.
Your task
- How would you alter the code so the sprinkler will turn on when the moisture level is less than 40?
- How would you alter the code so that the sprinkler will turn on when the moisture level is less than 25?
- What other values could you try? Choose other values and explain why you would use those values. What would you expect to happen? For example, you might try to make the water fall faster or slower by changing the value in the wait block or the amount by which the y coordinate decreases.
Record your thinking using a method of your choice. If possible, alter the code in Scratch to test your predictions.
Optional activity
Check out this altered application which simulates the moisture level in the soil by automatically decreasing the value over time. The moisture level is also checked over a set interval (set time) rather than constantly, to save energy by turning on the sprinkler at set intervals rather than off and on repeatedly.
In this case, the moisture level goes down by a value of one every two seconds. The moisture level is checked by the program every 10 seconds, rather than all the time. To conserve energy, systems might check the moisture level of the soil every hour, or twice daily.
Access the following Scratch link to explore the code: Scratch(Opens in a new window)
Consolidation
Putting it all together

Learning check!
Match some more terms to the definitions. Keep trying until you get all the terms matched correctly.
Planning an application
Think about your community and consider how a process or a procedure in your school, home, local store, library, or playground can incorporate IoT and be automated.
Plan out an application that will collect data from a sensor. Describe the potential impact of the technology. Are they positive, negative, or both? Explain your ideas.
Unsure what to focus on? You might consider traffic lights, household plants, lighting in the classroom, a community ice rink, etc.
Include the following information in your plan:
- sensor used to collect data
- input (data/information that is collected)
- processing of data (what is done to the information)
- output (what will happen in response)
- how this technology can help
- a flow chart (optional)
Press ‘Review’ to access ways to organize information and actions in flowcharts.
Different shapes for input, processing and output are used to organize information and actions in flowcharts. Input is a parallelogram, processing is a rhombus, output is a parallelogram.
|
Shapes used in a flowchart |
||
|---|---|---|
|
Input |
Processing |
Output |
|
Parallelogram |
Rhombus |
Parallelogram |
You may choose to share your plan digitally, orally, or in print. Share your plan with a partner, if possible.
Reflection
As you read the following descriptions, select the one that best describes your current understanding of the learning in this activity. Press the corresponding button once you have made your choice.
I feel…
Now, expand on your ideas by recording your thoughts using a voice recorder, speech-to-text, or writing tool.
When you review your notes on this learning activity later, reflect on whether you would select a different description based on your further review of the material in this learning activity.
Press ‘Discover More’ to extend your skills.
Discover More- Create an application in Scratch that simulates the software application required for your plan.
- Use a programmable device such as a micro: bit to collect data using a sensor.